
Do you want to highlight text in WordPress posts or pages using Bricks builder?
Headlines on websites are crucial for capturing visitors’ attention. If your page titles are eye-catching, more users will be drawn to a specific section, CTA button, special offer, or other content.
In the post, I’ll lay down a step-by-step tutorial on how to highlight text in WordPress using Bricks builder.
Before we start, let’s first look at the tool we’ll use for our tutorial.
Multi Heading Element of Max Addons for Bricks Builder
Bricks Builder is one of the newest WordPress page builders that offers some incredible features and functionalities; users don’t have to be professional developers to use it.
In a nutshell, Bricks Builder provides all the features required to build a fully-fledged WordPress website. Despite this, some creative functionalities are missing that may prove useful to existing users.
Speaking of the drawbacks, as of now, using Bricks Builder elements, you can’t add the highlighted text to your WordPress websites.
We’ve got you Max Addons for Bricks Builder to overcome this drawback.
Max Addons is a freemium addon for Brick Builder. This addon offers extensive functionalities that help you enhance your Bricks websites.
Multi Heading is one of the Max Addons elements. Using the element, you can create an awesome-looking heading for your web pages and eliminate the mediocre-looking titles.
Further, using the Multi Heading of Max Addons, you can:
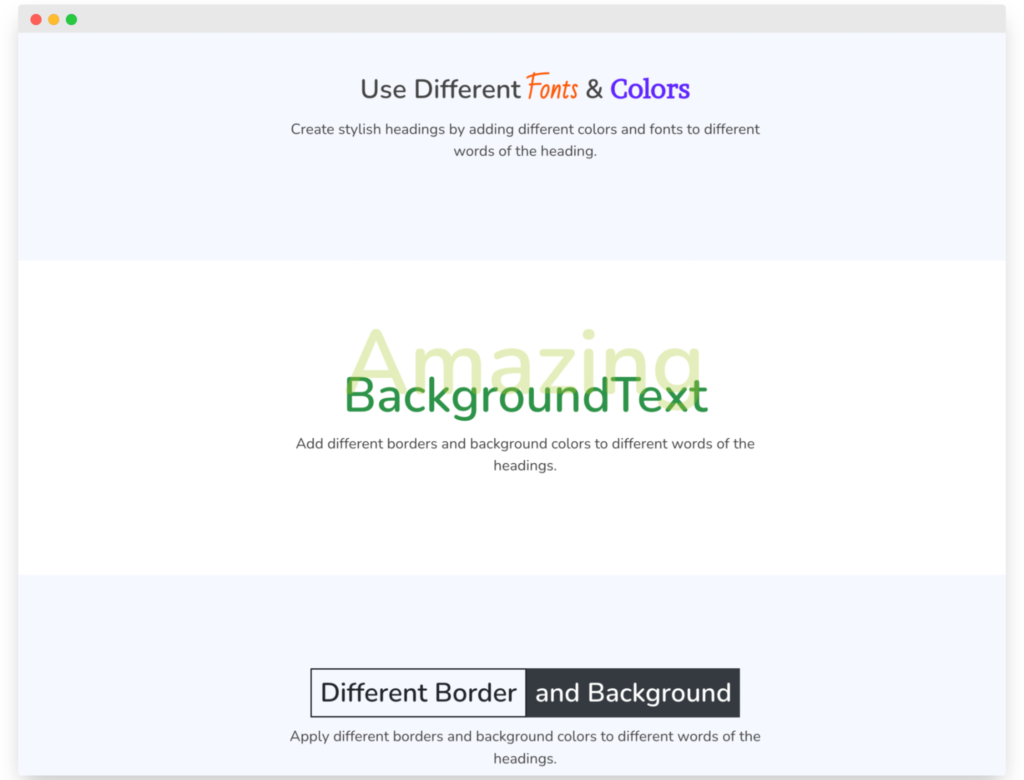
- Add highlighted heading text in Bricks.
- Create multi-headings & style them separately as per your preference.
- Add padding and border.
- Alter typography
- Change color
- Use an image, color, or icon as a background.
And more!
Now that you know all the features of the Multi Heading element let’s add a highlighted text in Bricks using the Multi Heading element of Max Addons.
How to Add Highlighted Text in Bricks?
Before we proceed, ensure you’ve installed and activated Bricks and Max Addons on your WordPress website.
Next, open the page using the Bricks editor, and search for the ‘multi heading” element.
Once the element appears, click on it to add the element to your page. Make sure to check the “Max” tag in the upper right corner of the page.
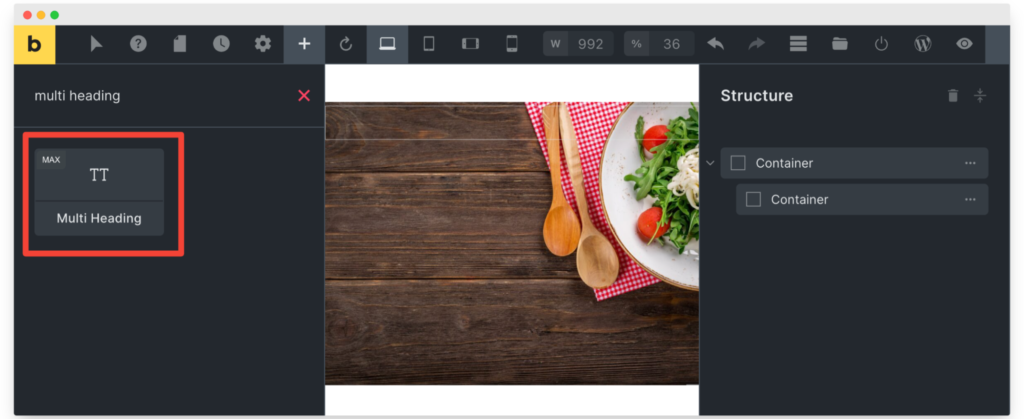
I’ve already added a background image on the page to make the heading more visually appealing.
As soon as you add the element to the page, its setting option appears on the left panel.
The Multi Heading element includes the Content and Style tab.
Let’s start with exploring and making changes to the Content tab options.
Content Tab of the Multi-Heading Element
In the Content tab of Multi Heading, you’ll find three sub-sections:
- HEADING
- BACKGROUND TEXT
- HEADING STYLE
We’ll see options in each subsection one by one.
HEADING
Open the Heading sub-section and change the default Heading Text #1 to your preferred custom text.
Apart from the heading options, you’ll get customization options such as:
- Typography
- Background
- Gradient Background
- Border
- Box Shadow
- Padding
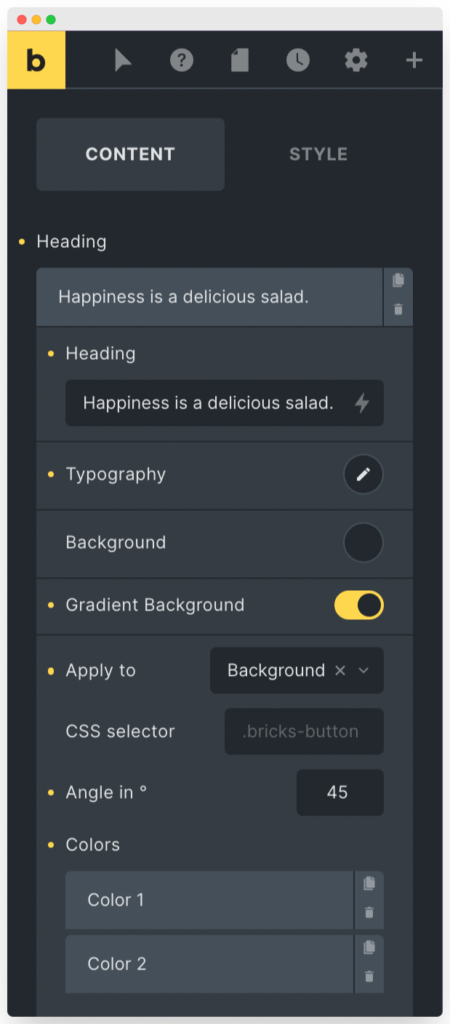
As all the styling options are self-explanatory and worth exploring, I would like to focus your attention on the Gradient Background option.
You need to enable the Gradient Background option to highlight your heading text.
Toggle on the option, and you’ll see options such as:
- Apply to
Choose where you need to apply the gradient effect, Background, Overlay, or Text.
- CSS selector
You also get an option to add custom CSS for selecting further options.
- Angle in °
To set the angle of the gradient effect.
- Colors
To add the primary & secondary gradient colors.
- Color stop in %
To stop the color gradient effect at the selected percentage value.
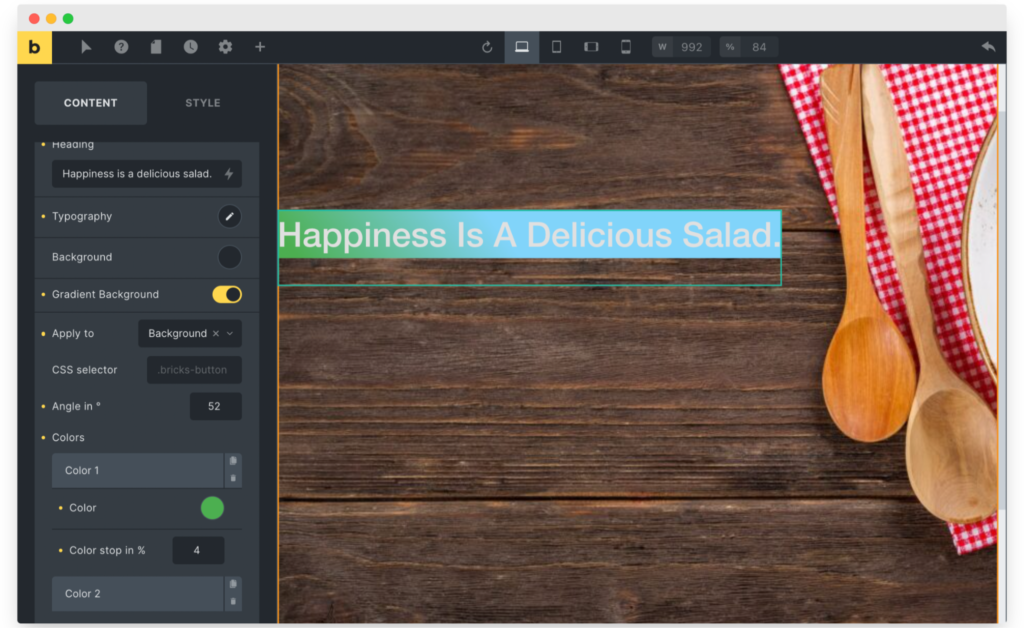
Having made all the changes, here’s how my highlighted text looks:
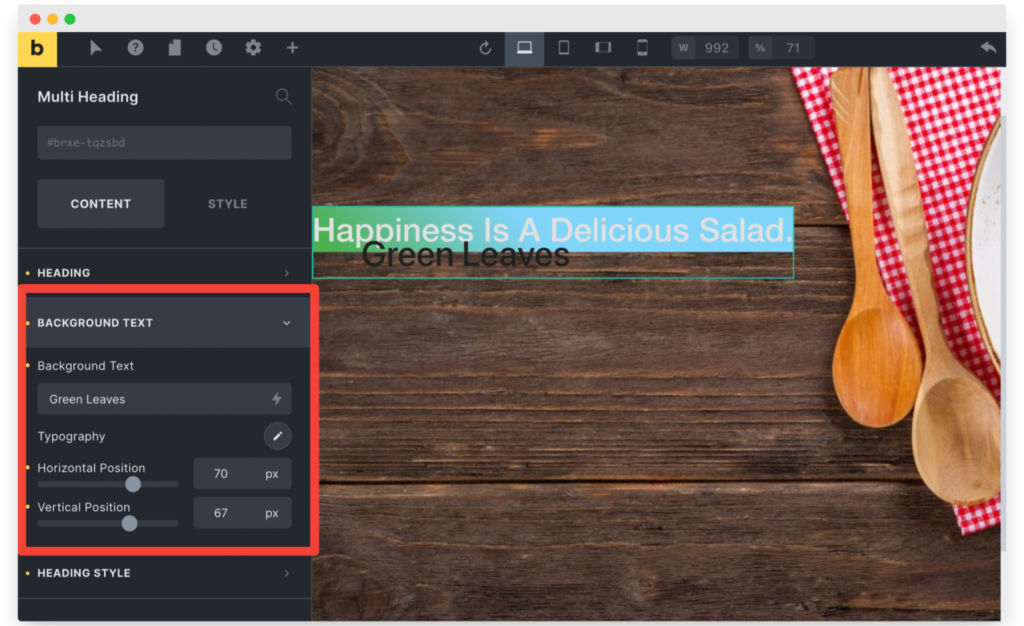
BACKGROUND TEXT
The following subsection is the BACKGROUND TEXT.
And as the name says, you can add a Text Background to your Heading from this subsection.
Moreover, you can also adjust the Horizontal Position and Vertical Position of the added custom text background.
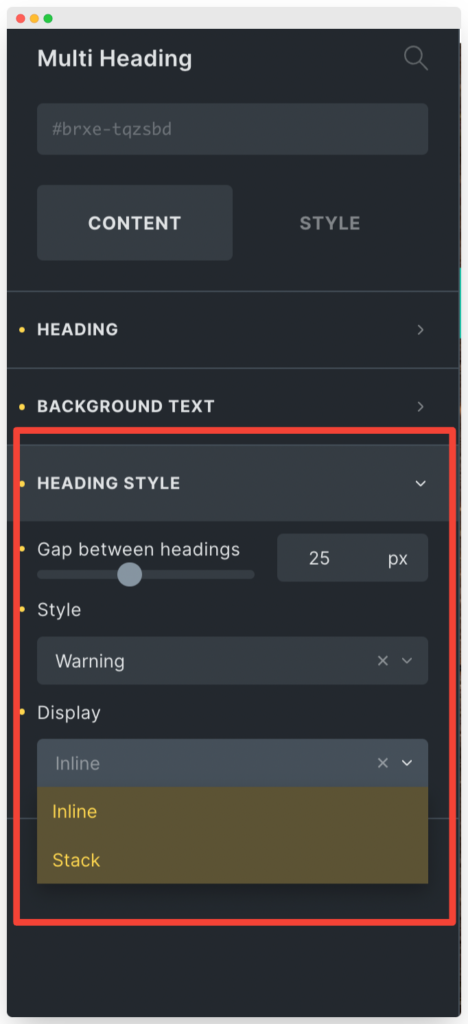
HEADING STYLE
In the Heading Style sub-section, you get options to adjust styling if you’ve added multiple headings to the page.
You can choose the Style and select your headings should be displayed Inline or Stacked positions.
Style Tab of Multi-Heading Element
After making changes in the Content tab, move to the Style tab.
In the Style tab, you’ll find 8 subsections:
- LAYOUT
- TYPOGRAPHY
- BACKGROUND
- BORDER / BOX SHADOW
- GRADIENT / OVERLAY
- TRANSFORM
- CSS
- ATTRIBUTES
Using the layout subsection, you can modify the Spacing and Sizing of the overall layout of the Multi Heading element.
You can adjust the spacing by adding Margin and Padding. In addition, you can set the size by selecting Width, Min. Width, Max. Width and more.
Also, you can change the element’s Alignment per your preferences.
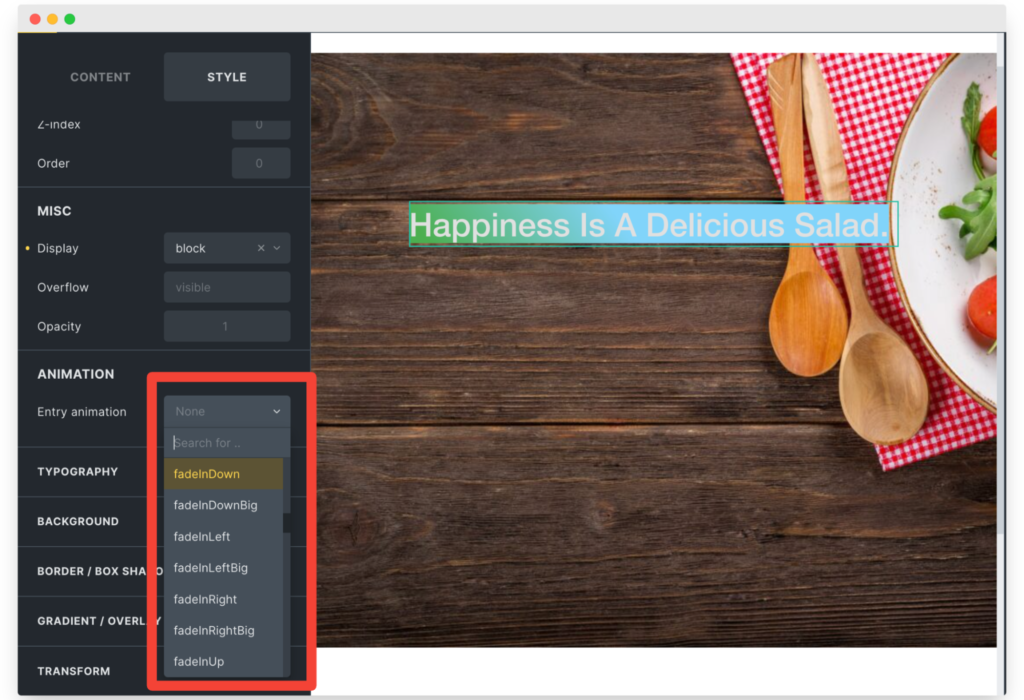
Furthermore, you get some advanced options for Positioning and MISC settings.

Last but not least, you can choose and add some interactive Animations to your highlighted text.
Within the styling tab of the subsection, you can control the styling properties of every single element of the Multi Heading element.
Make your headings stand out by playing around with the styling options. You can experiment with different fonts, colors, and styles to create unique headings.
After customizing the options in the Style tab, this is how my Multi Heading element looks on the live page.

Get Max Addons for Bricks Builder!
I hope this guide helps you add highlighted text in Bricks Builder.
In addition to the Multi Heading element, Max Addons offers 50+ unique elements. Using these elements will speed up the process of building your website, saving you time and money in the long run.
Click here to get Max Addons today!
If you found this tutorial helpful, show your love by commenting below!
1 comment
Kirsty Hancock
Great little walk through however i always find using these multi headers need extra responsivity markers manually added.