Max Addons brings you advanced display conditions for Bricks Builder. You can now showcase content on your web pages based on custom rules and WooCommerce parameters.
Let's see how you can use these display conditions to show/ hide content on your WordPress website built with Bricks Builder.
Display Elements in Bricks Builder based on Post Type Conditions#
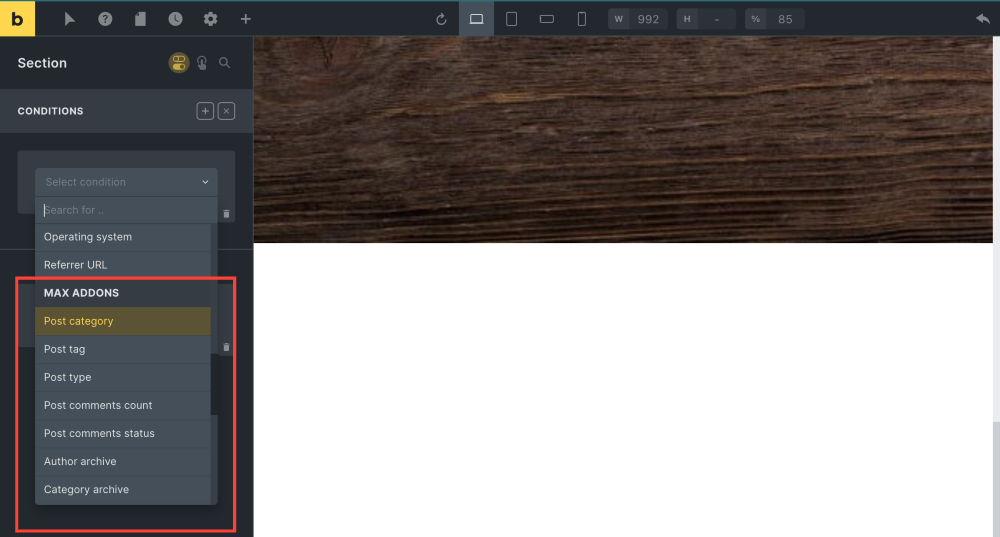
Bricks Builder comes with many display options but lacks Post Type conditions. Max Addons solves this by offering various display conditions based on Post types, such as Post category, Post tag, Post comments count, and more.
Enable the Display Condition feature of Bricks Builder#
First, you need to enable the default Bricks Builder display condition feature.
To do that,
Step 1: Open your page using Bricks editor, and add a Section, Container, or any Element you choose.
Step 2: Next, toggle on the Conditions option at the top of the menu and click the "+" sign to add conditions to your page.
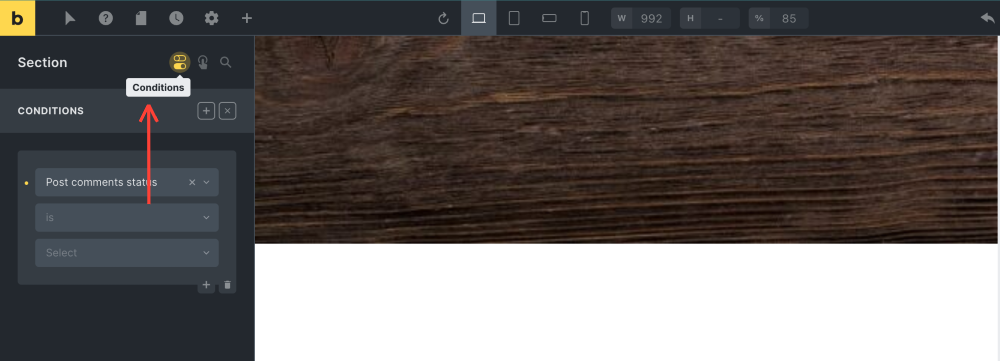
Step 3: Once done, you'll find a drop-down menu with the built-in condition options of Bricks. Scroll the menu till you see the heading Max Addons.
Now, let's go through each display condition of Max Addons individually.
1. Post Category#
With this condition, you can show specific elements based on Post Categories. This allows you to customize content and design elements to be visible only on posts that belong to particular categories.
To set display conditions based on post category:
- Select "Post Category" from the dropdown menu options.
- Another dropdown menu with "Is" and "Is Not" options will appear.
- Choosing "Is" will make your statement true.
- Opting for "Is Not" will make your statement false.
- Then, select your desired Post Category.

2. Post tag#
Using this condition, you can show content based on Post Tags. This lets you target specific audience segments by displaying customized content relevant to the tags associated with your posts, enhancing user engagement and customization.
- Select "Post tag" from the dropdown menu options.
- Another dropdown menu with "Is" and "Is Not" options will appear.
- Choosing "Is" will make your statement true.
- Opting for "Is Not" will make your statement false.
- Then, select your desired Post tag.
3. Post type#
This condition allows you to display elements specific to different post types, such as audio, video, or image etc.
4. Post comments count#
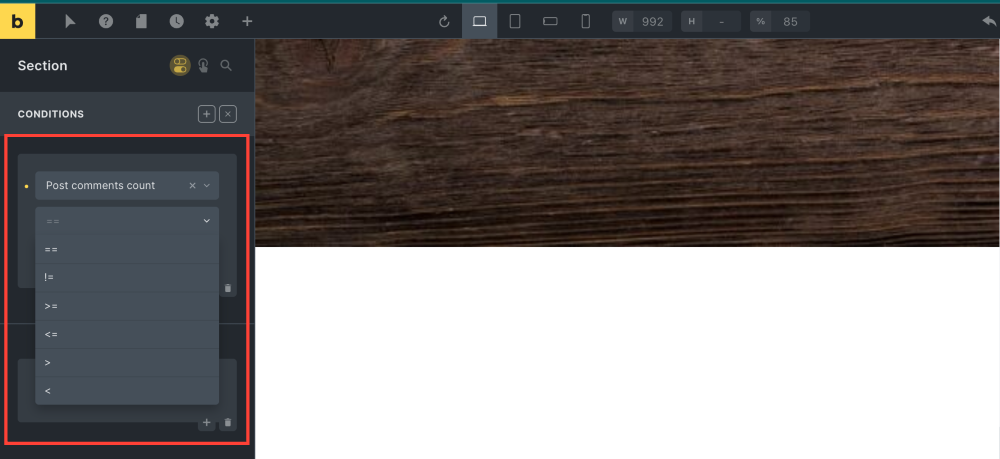
This condition allows you to build powerful targeted engagement strategies by letting you customize your content visibility based on the number of comments a post has. Here's how to set it up:
- From the dropdown menu, select Post comments count.
- Another dropdown menu will appear with signs like:
- == (Is equal to)
- != (Is not equal to)
- = (Is greater than or equal to)
- <= (Is less than or equal to)
- (Is greater than)
- < (Is less than)
- Choose one of these options and add the desired count number.
5. Post comments status#
Using this condition, you can show elements based on the status of a post's comment (e.g., open, closed), controlling content visibility dynamically.
6. Author Archive#
You can personalize author-specific content by displaying elements on your Bricks website exclusively on individual author archive pages.
7. Category archive#
You can enhance the user experience by showcasing elements exclusively on category archive pages.
8. Tag archive#
With this condition, you can target audience interests by displaying elements exclusively on tag archive pages.
9. Search#
You can improve search result relevance by displaying specific elements on search pages, aiding users in finding what they're looking for.
10. Request Parameter#
This condition lets you dynamically show elements based on specific URL parameters, allowing for highly customized and interactive user experiences.
Display Elements in Bricks Builder based on WooCommerce Parameters#
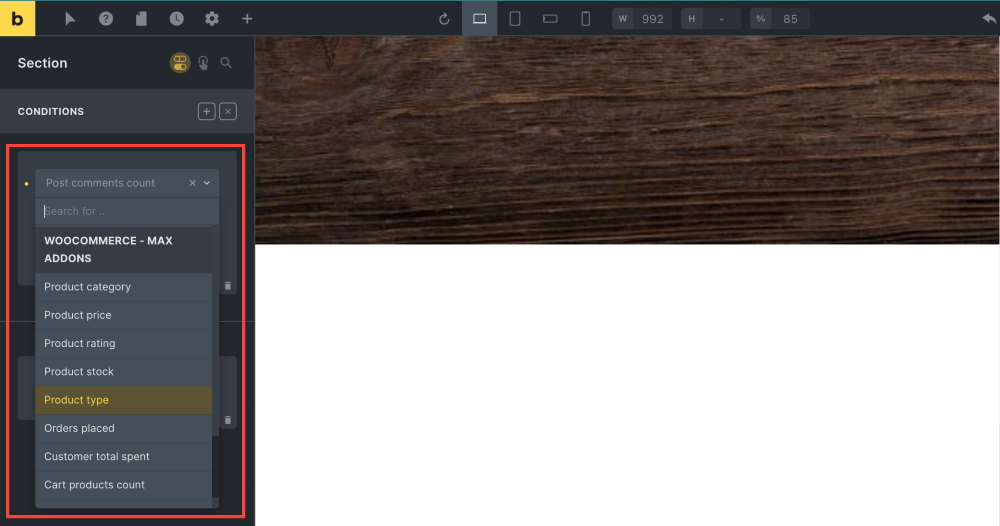
Max Addons Display Conditions also allows you to show or hide content based on WooCommerce parameters such as Product Category, Product Stock, and Cart Products.
We'll guide you on how to use Max Addons WooCommerce Display Conditions on your WordPress websites.
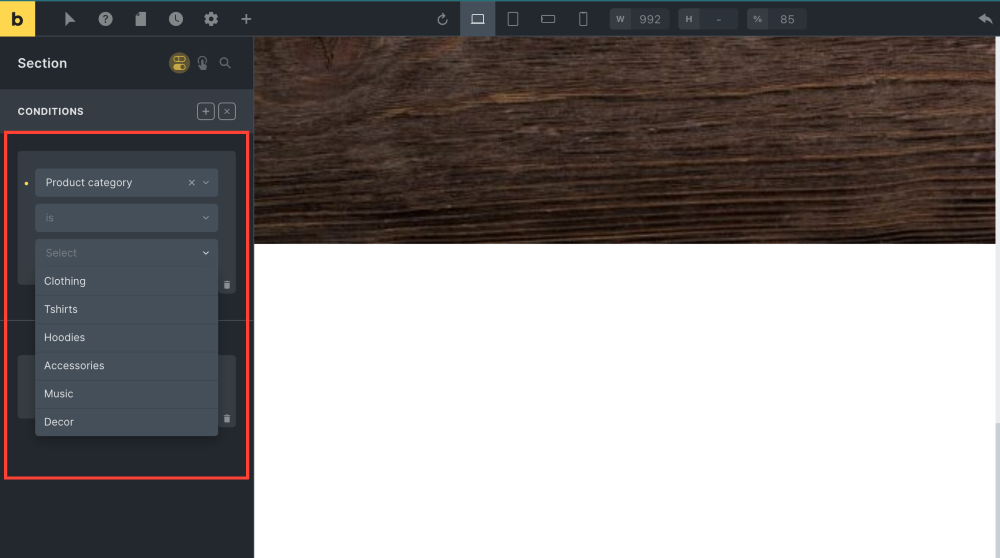
1. WooCommerce Product category#
With this condition, you can showcase content on a WooCommerce Single Product template according to the current Product Category.
To display Bricks Builder Content based on WooCommerce Product Category:
- Select "Product Category" from the dropdown menu options.
- You'll see another dropdown menu with "Is" and "Is Not" options.
- Choosing "Is" will make your statement true.
- Opting for "Is Not" will make your statement false.
- Then, select your desired Product Category.
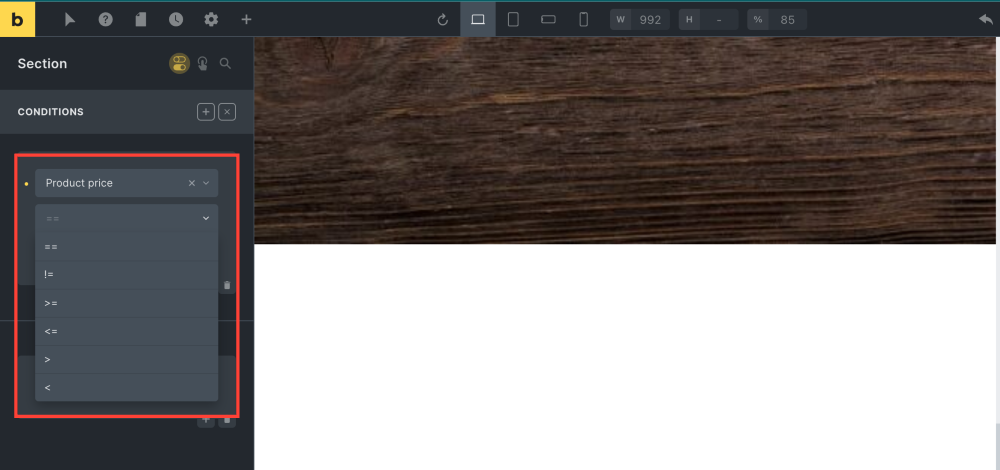
2. WooCommerce Product price#
Using this feature, you can show price-sensitive messages like 'limited-time offer' on your WooCommerce Single Product page.
This condition allows you to display content based on the product price being above, below, or equal to a specific amount. Here's how:
- From the dropdown menu, select Product Price.
- Another dropdown menu will appear with signs like:
- == (Is equal to)
- != (Is not equal to)
- = (Is greater than or equal to)
- <= (Is less than or equal to)
- (Is greater than)
- < (Is less than)
- Choose one of these options and add the desired amount.
3. WooCommerce Product rating#
This condition lets you display content based on product ratings on your WooCommerce Single Product page. Here's how to set it up:
- From the dropdown menu, choose Product Rating.
- Select a rating rule that fits your criteria, like 'Is equal to,' 'Is not equal to,' 'Is less than,' 'Is greater than,' and more.
- After selecting your rule, add the specific rating number you prefer."
4. WooCommerce Product stock#
With this condition, you can showcase content on your WooCommerce sites based on product stock levels. Here's how you can do it:
- Choose Product Stock from the dropdown menu.
- Select a rule that suits your needs, such as 'Is equal to,' 'Is not equal to,' 'Is less than,' 'Is greater than,' or others.
- After choosing your rule, add the specific product stock number."
5. WooCommerce Product type#
This condition option allows you to show content based on the product type - simple, grouped, variable, or external - using this condition.
Here's how to set it up:
- Choose Product Type from the dropdown menu.
- Another dropdown menu will appear with the 'Is' and 'Is Not' options.
- Selecting 'Is' will make your statement true.
- Choosing 'Is Not' will make your statement false.
- Then, pick your desired product type."
6. WooCommerce Orders placed#
This condition allows you to show content depending on the customer's order history/orders placed.
Here's how to set it up:
- From the dropdown menu, select Orders Placed.
- Another dropdown menu will appear with options like:
- == (Is equal to)
- != (Is not equal to)
- = (Is greater than or equal to)
- <= (Is less than or equal to)
- (Is greater than)
- < (Is less than)
- Choose one of these rules and specify the desired order count."
7. WooCommerce Customer total spent#
This condition allows you to tailor content based on customers' total spent amount, covering taxes, shipping, and discounts.
To set it up:
- Select Cart Total from the dropdown menu.
- Another dropdown will appear with options like:
- == (Is equal to)
- != (Is not equal to)= (Is greater than or equal to)
- <= (Is less than or equal to)
- (Is greater than)
- < (Is less than)
- Choose a rule from these options and specify the desired amount.
8. WooCommerce Cart products count#
This condition lets you show a personalized message or a discount offer banner based on the WooCommerce cart product count.
Here's how to set it up:
- Choose Cart Products Count from the dropdown menu.
- Another dropdown menu will appear with sign options:
- == (Is equal to)
- != (Is not equal to)= (Is greater than or equal to)
- <= (Is less than or equal to)
- (Is greater than)
- < (Is less than)
- Choose a rule from these options and specify the desired amount.
9. WooCommerce Cart products#
With this condition, you can show a tailored message or a discount offer banner depending on the WooCommerce products in your cart.
Here's how to set it up:
- From the dropdown menu, select Cart Products.
- Another dropdown menu will appear with the 'Is' and 'Is Not' options.
- Choosing 'Is' will make your statement true.
- Opting for 'Is Not' will make your statement false.
- Then, select your desired Cart Products.
10. WooCommerce Cart total#
This condition allows you to customize content based on the total amount in your cart, encompassing taxes, shipping, and discounts.
To set it up:
- Select Cart Total from the dropdown menu.
- Another dropdown will appear with sign options like:
- == (Is equal to)
- != (Is not equal to)
- = (Is greater than or equal to)
- <= (Is less than or equal to)
- (Is greater than)
- < (Is less than)
- Choose a rule from these options and specify the desired amount.
Here is how you can use Max Addons Display Condition to display customized content to your visitors. I hope this helps!