
If you’re offering products or services online, a comparison pricing table is the best element to present your pricing options in an organized, accessible way.
Comparison pricing tables allow prospective buyers to understand your prices at a glance, helping them make faster, more informed decisions. With a toggle-enabled table, you can provide multiple pricing views, like monthly vs. annual billing, and highlight the differences in a streamlined interface.
In this step-by-step guide, we’ll create a toggle-enabled comparison pricing table using Bricks Builder and Max Addons.
Create a Pricing Comparison Table in Bricks Builder Using the Max Addons’ Toggle Element
We’ll break down the process into two parts:
- Creating the Pricing Tables: First, we’ll use Bricks Builder Pricing Table element to create individual pricing tables.
- Setting Up the Toggle Comparison Table: Next, we’ll use the Toggle element from Max Addons to display the pricing tables in a single, interactive view.
Part 1: Create a Pricing Table With Bricks Builder
The first step is setting up our individual pricing tables. Here, we’ll design each table separately and save them as templates to be used in the toggle feature.
Step 1: Create a New Page
To start, let’s create a new page on your WordPress site where we’ll build the pricing tables.
Navigate to your WordPress Dashboard, then go to Pages >> Add New.

Give your page a title, and click on the Publish button.
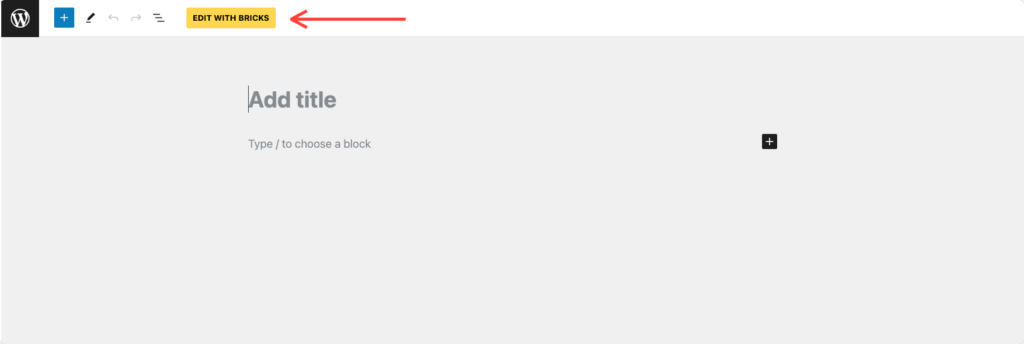
Step 2: Open the Page in Bricks Builder
Give your page a title, and click on the Publish button.
Next we need to edit the page with Bricks Builder. Click Edit with Bricks to open the page in Bricks Builder editor.
Step 3: Add a Section for the Pricing Table
In Bricks Builder, content is arranged in sections and elements. For our pricing tables, we’ll start by adding a section where the pricing tables will be placed.
Click the “+” icon in the Bricks editor to add a new Section to the page.

Step 4: Insert the Pricing Table Element
In the Bricks Builder elements panel, search “pricing table”. Once the Pricing Table appears, click on it to add the element to the section.

Step 5: Customize the Pricing Table Content
Once the Pricing Table element is added, we can customize the content to match your pricing structure.
In the left panel, click the Content tab to access the editable fields. Here, you’ll be able to specify the plan name (e.g., “Basic,” “Premium”), pricing amount, and features.
For example, let’s say you’re offering a SaaS tool called “TaskPro.” You could create pricing tables for different plans (e.g., “Starter,” and “Pro”) and set the pricing for monthly and annual options.
Adding Features and Details
- Plan Name and Description: Fill in a clear plan name and a brief description highlighting the plan’s benefits.
- Price: Enter the price for the plan, specifying if it’s monthly or annual.
- Feature List: Add key features, such as “Unlimited Projects,” “5 Team Members,” or “24/7 Support.”
Repeat this for any additional plans you wish to include in your comparison pricing table.
Step 6: Style the Pricing Table
With the content in place, it’s time to style your pricing tables to match your site’s design.
You’ll find options for Table Background, Borders, Text Styles, and Button Customization.
Suggested Styling Options:
- Background Color: Choose a color that complements your site’s branding.
- Border: Add a subtle border around each table for definition.
- Typography: Customize the font, size, and weight of the text.
- Buttons: Use a contrasting button color to draw attention to the call-to-action.

Step 7: Save Each Pricing Table as a Template
Since we’re creating a comparison table with toggle options, we’ll save each pricing table as a separate template to load them in the toggle view later easily.
Right-click on the section with your pricing table, then select Save as Template.
Give the template a clear, descriptive name, such as “TaskPro Monthly Plan” or “TaskPro Annual Plan” to avoid confusion. Click Save to store the template.
Repeat the above steps to create additional pricing tables and save each section as a separate template.

Part 2: Display Comparison Pricing Table Using the Content Toggle Element
With the pricing tables saved as templates, we’re ready to set up the comparison toggle table using Max Addons’ Content Toggle element.
Step 1: Create a New Page or Edit the Existing One
To keep things organized, you can create a new page to display the toggle comparison table. However, if you’d prefer to avoid switching back and forth between pages, you can simply use the same page where you created the pricing table template.
To do this, delete the pricing table element from the existing page and add the Toggle element.
If you create a new page, navigate to Pages >> Add New in your WordPress Dashboard. This page will serve as your website’s main pricing page, so choose an appropriate name, such as “Pricing.”
Step 2: Add the Toggle Element
Once the page is created, open it in Bricks Builder and add the Content Toggle element.
Click Edit with Bricks to open the page in the Bricks editor. In the elements panel, search for “toggle”. Make sure you see the “Max” tag, which indicates it’s a Max Addons element.
Click the Toggle element to add it to your page.

Step 3: Choose a Switch Style
The first section in the Content tab is Tabs. From here first we need to choose the toggle switch style.
Max Addons’ Toggle element offers several Switch Style options to customize the look of the toggle:
- Round: A circular toggle switch.
- Rectangle: A rectangular switch with rounded edges.
- Round Line: A sleeker, line-style toggle with rounded edges.
- Rectangular Line: A line-style toggle with sharp edges.
Select a switch style that matches your website design.

Step 4: Add Labels and Set Content Type
Once you choose the switch style, next configure the labels and content type for our toggle switch:
In the Primary and Secondary sections within the Content tab, add labels that specify the pricing types (e.g., “Monthly” and “Annual”).
For Content Type, select Saved Templates and choose the template you saved for each pricing plan.
By selecting “Saved Templates,” we can fetch the pricing tables created earlier without recreating them from scratch.

Step 5: Adjust Toggle Settings
Next, we’ll set up additional options for the toggle element to ensure it behaves as you’d like. The options you get are Alignment, Toggle Position and Spacing.
- Default Display: Decide which pricing table should display first (e.g., Monthly or Annual).
- Toggle Position: Adjust the position and alignment of the toggle to match your design.

Step 6: Customize Toggle Appearance
In the TOGGLE STYLE tab, you get options to customize the appearance of the toggle switch:
- Typography: Adjust font, size, and weight for the toggle labels.
- Label Spacing: Customize spacing around the labels for a balanced look.
- Background Color: Choose a background color for the toggle that aligns with your site’s design.
- Text Colors: Set the active and inactive text colors to clear the toggle switch.

Step 7: Style the Content Section
With the toggle switch styled, we can now refine the styling of the content that appears when toggled.
- Padding: Adjust spacing within each pricing table section for a polished appearance.
- Text Alignment: Choose left, center, or right alignment based on your layout.
- Typography: Customize the text style for headings, features, and pricing details.
- Background & Border: Add a background and border to each content section for clarity.
- Box Shadow: Add subtle shadow effect.

Step 8: Preview and Publish
Once you are done with all the customizations, preview the page to ensure the toggle functions smoothly and all content appears as expected.
If everything looks good, click Publish to make the page live.

Wrapping Up!
And that’s how you can use Bricks Builder and Max Addons to create a toggle-enabled comparison pricing table! Comparison pricing table improves user experience and enhances your conversion potential by showcasing the flexibility and value of your offerings in a visually appealing, interactive format.
Enjoyed this tutorial? You might also like our guide on how to create a table of contents in Bricks Builder.
Max Addons offers 50+ unique elements to supercharge your website-building process. These elements can streamline your workflow, saving you time and resources. Are you ready to elevate your website creation journey? Get Max Addons today!
What do you think about this tutorial? We’d love to hear from you—drop a comment below!
2 comments