
If you’ve ever visited a news website, you’ve probably seen a thin strip at the top showing moving headlines like “Breaking News” or “Latest Updates.” That moving strip is called a content ticker.
The good news? You can create the same thing on your WordPress website without writing a single line of code.
In this tutorial, we’ll use Bricks Builder, along with Max Addons, an extension that adds extra features to Bricks Builder, to create a fully customizable Content Ticker. I’ll walk you through everything step by step in a simple, beginner-friendly way.
Let’s get started!
What Is a Content Ticker?
A content ticker is mainly a horizontal section that displays scrolling or sliding content. It’s commonly used to show:
- Breaking news
- Trending blog posts
- Announcements
- Offers or discounts
- Product updates
Since the content moves automatically, it stands out immediately. That’s why many websites place it at the top of the page.
Now let’s build one inside Bricks Builder using Max Addons.
How To Create Content Ticker Using Bricks Builder
Step 1: Install Max Addons & Bricks Builder
Before creating the ticker, make sure you have Bricks Builder and Max Addons installed on your WordPress website. The Content Ticker element is part of Max Addons; it doesn’t come with Bricks Builder by default.
Once both the tools are activated, you’re ready to use the Content Ticker element inside Bricks Builder.
Step 2: Create or Edit a Page
Next, decide where you want your content ticker to appear. You can either:
- create a new page
- or edit an existing page.
To create a new page, go to Pages >> Add New, add a title, and click Edit With Bricks.

If you already have a page ready, simply open it and click Edit With Bricks. This will open the visual builder interface.
Step 3: Add the Content Ticker Element
Once you’re inside the Bricks editor, look at the left sidebar. At the top, you’ll see a search bar. Type “content ticker”
You’ll see the element appear in the list. Make sure you check for the “MAX” tag.
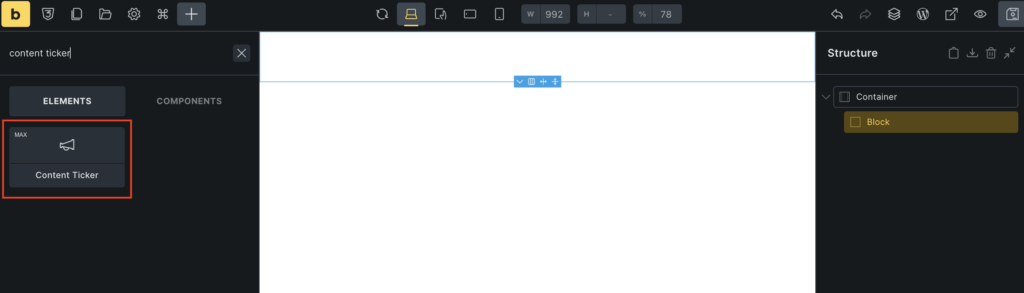
Add the Content Ticker element to your page. As soon as you add it, you’ll notice it already contains some sample items. These are just default placeholders that we’ll edit next.
Step 4: Customize Ticker Items
Click on the Content Ticker element and go to the Content tab. You’ll find a section called Ticker Items. By default, it includes four items:
- Content Ticker Item 1
- Content Ticker Item 2
- Content Ticker Item 3
- Content Ticker Item 4
These serve as placeholders for your content.
Editing a Ticker Item
Click on any ticker item. You’ll see fields for:
- Title
In the Title field, enter your headline. For example: “New Feature Released”, “Limited Time Offer: 30% OFF”, “Read Our Latest Blog Post”.
You can also:
- Add a link so users can click the item.
- Add an image to make it more engaging.
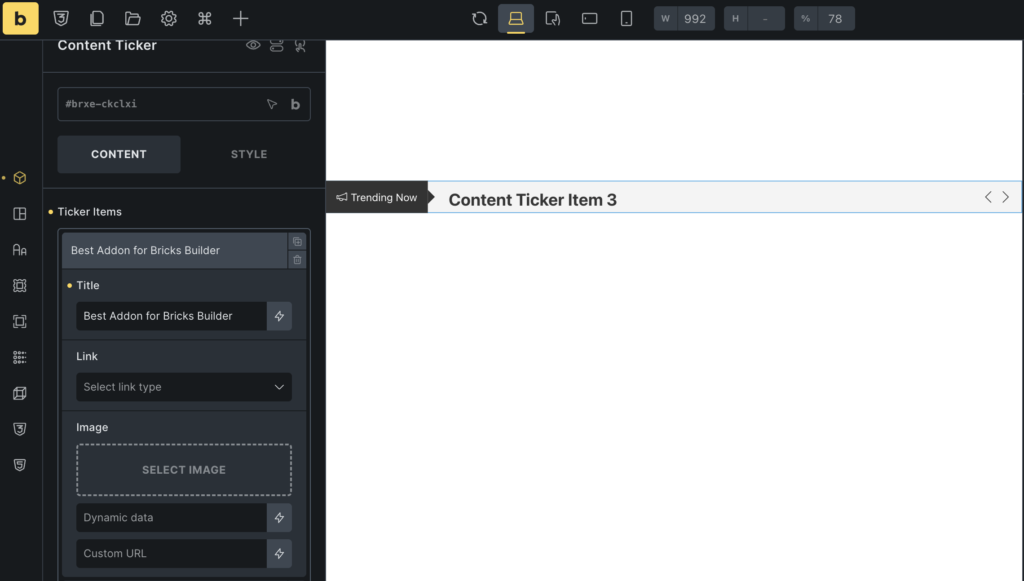
This is useful if you’re linking to blog posts or products.
Adding More Items
If you need more than four items, simply click Add Ticker Items. A new item will appear, and you can fill it in the same way.
Try not to overload the ticker. Too many items can make it feel cluttered.
Removing Items
If you don’t need one of the default items, delete it. Keeping only relevant items makes your ticker cleaner and more effective.
Using Query Loop (Automatic Content)
If you want the ticker to automatically display content from your website, enable the Query Loop option. This allows the ticker to pull:
- Blog posts
- Products
- Custom post types
For example, if you choose “Posts,” your ticker will automatically display your latest blog articles. Whenever you publish a new post, it will appear in the ticker automatically.
This is especially useful for blogs and eCommerce websites.
Step 5: Customize the Ticker Settings
Now let’s control how the ticker behaves. Inside the settings panel, you’ll find several important options.
- Mode: This controls how the ticker moves. It can scroll continuously or behave like a slider. Choose the style that fits your design.
- Slider Speed: This controls how fast the content moves.
- Loop: When enabled, the ticker repeats continuously. Most websites keep this turned on.
- Autoplay: Autoplay makes the ticker move automatically. If you enable Autoplay, you’ll also see:
- Pause on Hover: Stops the ticker’s movement when the user hovers over it.
- Autoplay Speed: Controls how long each item remains visible before the next item appears.
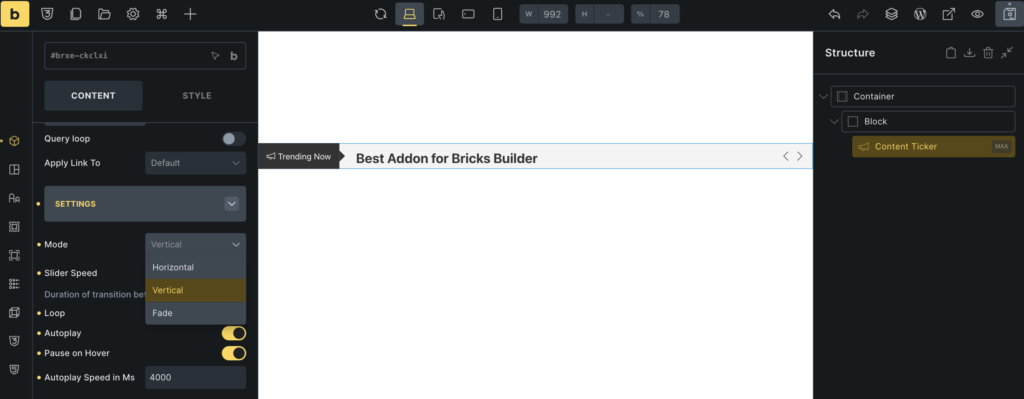
Step 6: Customize the Content Design
Now let’s make the ticker match your website’s design. Go to the Style tab.
- Title Styling
- Choose the HTML tag (H2, H3, Paragraph, etc.)
- Adjust font size
- Change font weight
- Modify text color
- Adjust spacing
Make sure the text is readable and matches your branding.
- Customize the Image: If you added images to your ticker items, you can style them as well. You can adjust:
- Border (width, color, radius)
- Image width
- Margin
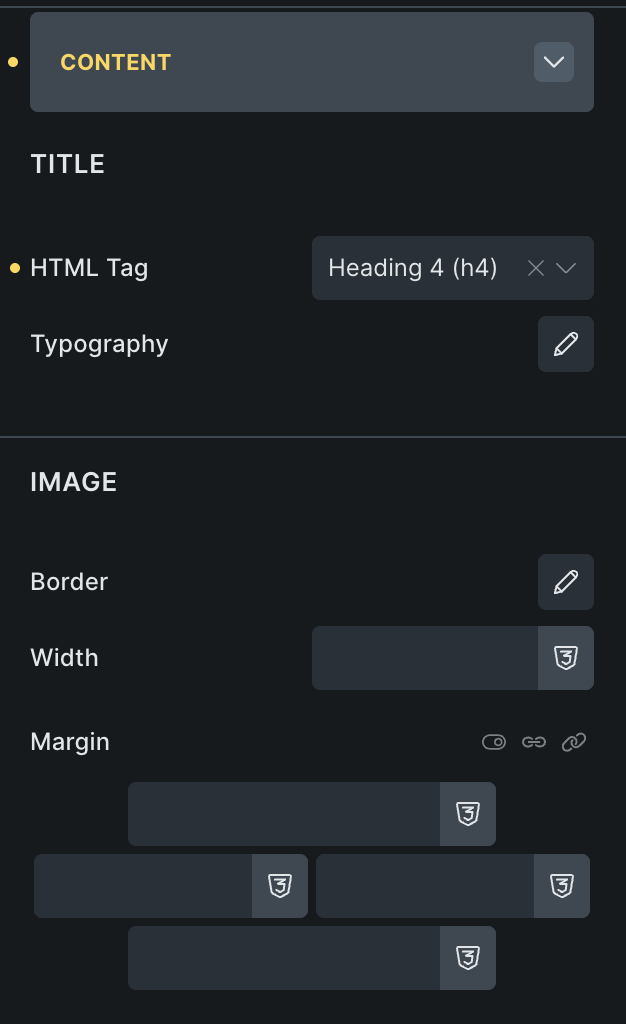
For a modern look, try adding slightly rounded corners.
Step 7: Add a Header Label
If you want to add a label beside the ticker, enable Show Heading. This is useful for adding text like:
- Trending News
- Latest Posts
- Announcements
Once enabled, you can:
- Add custom heading text.
- Choose an icon
- Set the icon position (Top, Right, Bottom, or Left)
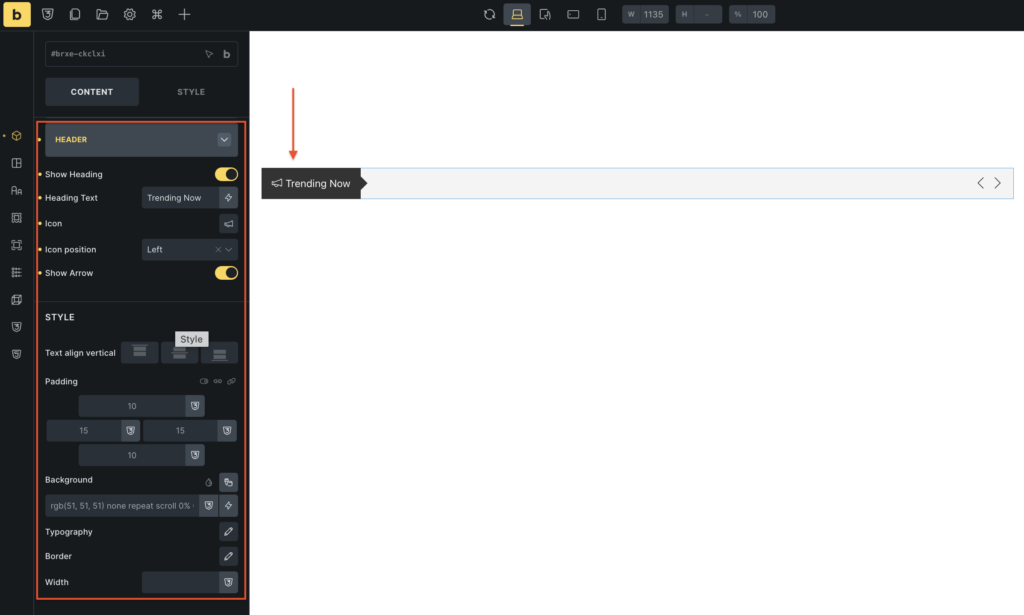
You can also style the heading using typography, padding, and borders.
Step 8: Enable and Style Arrows
If you want users to manually control the ticker, enable the Show Arrows option. You can customize:
- Arrow height and width
- Background color
- Border style
- Icon size
- Spacing
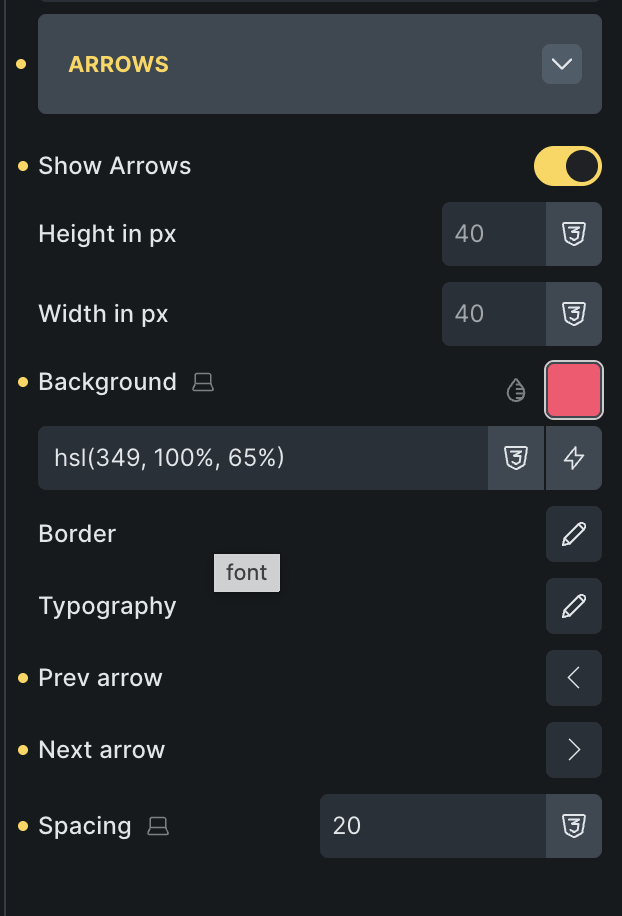
You can even style the previous and next arrows separately. Make sure the arrows are clearly visible but not too large.
Where Can You Use a Content Ticker?
A content ticker works best in areas where you want to grab attention quickly. Some common placements include:
- Top header bar
- Below the navigation menu
- Homepage hero section
- Above blog posts
- Announcement bar
But let’s explore more.
Which Types of Websites Benefit From Content Tickers?
Content tickers are useful for many types of websites. Here are some examples:
1) News & Magazine Websites
They can display:
- Breaking news
- Trending stories
- Latest headlines
2) Blogging Websites
Bloggers can highlight:
- New posts
- Popular articles
- Featured content
3) eCommerce Websites
Online stores can use tickers to show:
- Flash sales
- Limited-time offers
- Free shipping announcements
- New product arrivals
4) Business Websites
Companies can display:
- Important announcements
- Event updates
- Service highlights
5) Educational Websites
Schools, institutes, or online course websites can use tickers for:
- Admission notices
- Exam updates
- Webinar announcements
6) Portfolio & Personal Websites
Freelancers and creators can highlight:
- Recent projects
- Client testimonials
- New services
In short, any website that regularly shares updates can benefit from a content ticker.
Best Practices for Using Content Tickers
To keep your ticker effective:
- Keep headlines short
- Avoid very fast animation.
- Use readable font sizes.
- Enable pause on hover.
- Match your brand colors.
- Don’t overload with too many items.
Remember, the goal is to highlight important information, not overwhelm your site visitors.
Final Thoughts!
Creating a content ticker using Bricks Builder and Max Addons is simple and powerful. No coding. No complex setup. In just a few minutes, you can create a professional-looking ticker that keeps your website dynamic and engaging.
If you’re using Bricks Builder, this is one of the easiest ways to make your website stand out.
Next, you might be interested in learning how to make a button that toggles an off-canvas element in Bricks Builder.
Max Addons offers an extensive set of creative elements to enhance your website-building process using Bricks Builder. These elements can streamline your workflow, saving you time and resources.
Are you ready to elevate your website creation journey? Get Max Addons today!
