An image gallery with category filters is one of the best ways to showcase your photos professionally and creatively. If you’re looking for a simple way to create a filterable image gallery using Bricks Builder, You’re in luck! In this guide, we’ll show you how to do it step by step using the Max Addons Image Gallery Element.
But before we dive in, let’s check out what cool features the Image Gallery element has.
Features of Max Addons Image Gallery Element
Max Addons’ Image Gallery element helps you build a gallery that’s visually appealing, engaging, and fun to explore.
Some of its key features are:
- Standard or Filterable Gallery Layout: Choose a classic album style or a fun interactive gallery. The standard layout keeps things neat, like flipping through a photo album. The filterable option adds a cool twist, letting visitors explore your images based on different categories or tags.
- Grid and Masonry Layouts: Grid layout organizes your images in a neat grid pattern, like photos on a wall. Masonry layout gives a more modern, artistic feel, with images fitting together like a puzzle.
- Typography Styling Options: Customize how your text looks! Change your image captions’ font, size, and style to match your gallery’s vibe.
- Border/Box Shadow: Add a frame or shadow to make your images stand out. It’s like putting them in a fancy frame or spotlight to catch attention.
- Tilt Effect: Make your gallery interactive! The tilt effect adds a playful touch, making images respond to cursor movements.
These are some key features of Image Gallery Element for Bricks Builder. Let’s go through the steps of creating the filterable gallery using Max Addons.
Create a Filterable Image Gallery using Bricks Builder with Max Addons
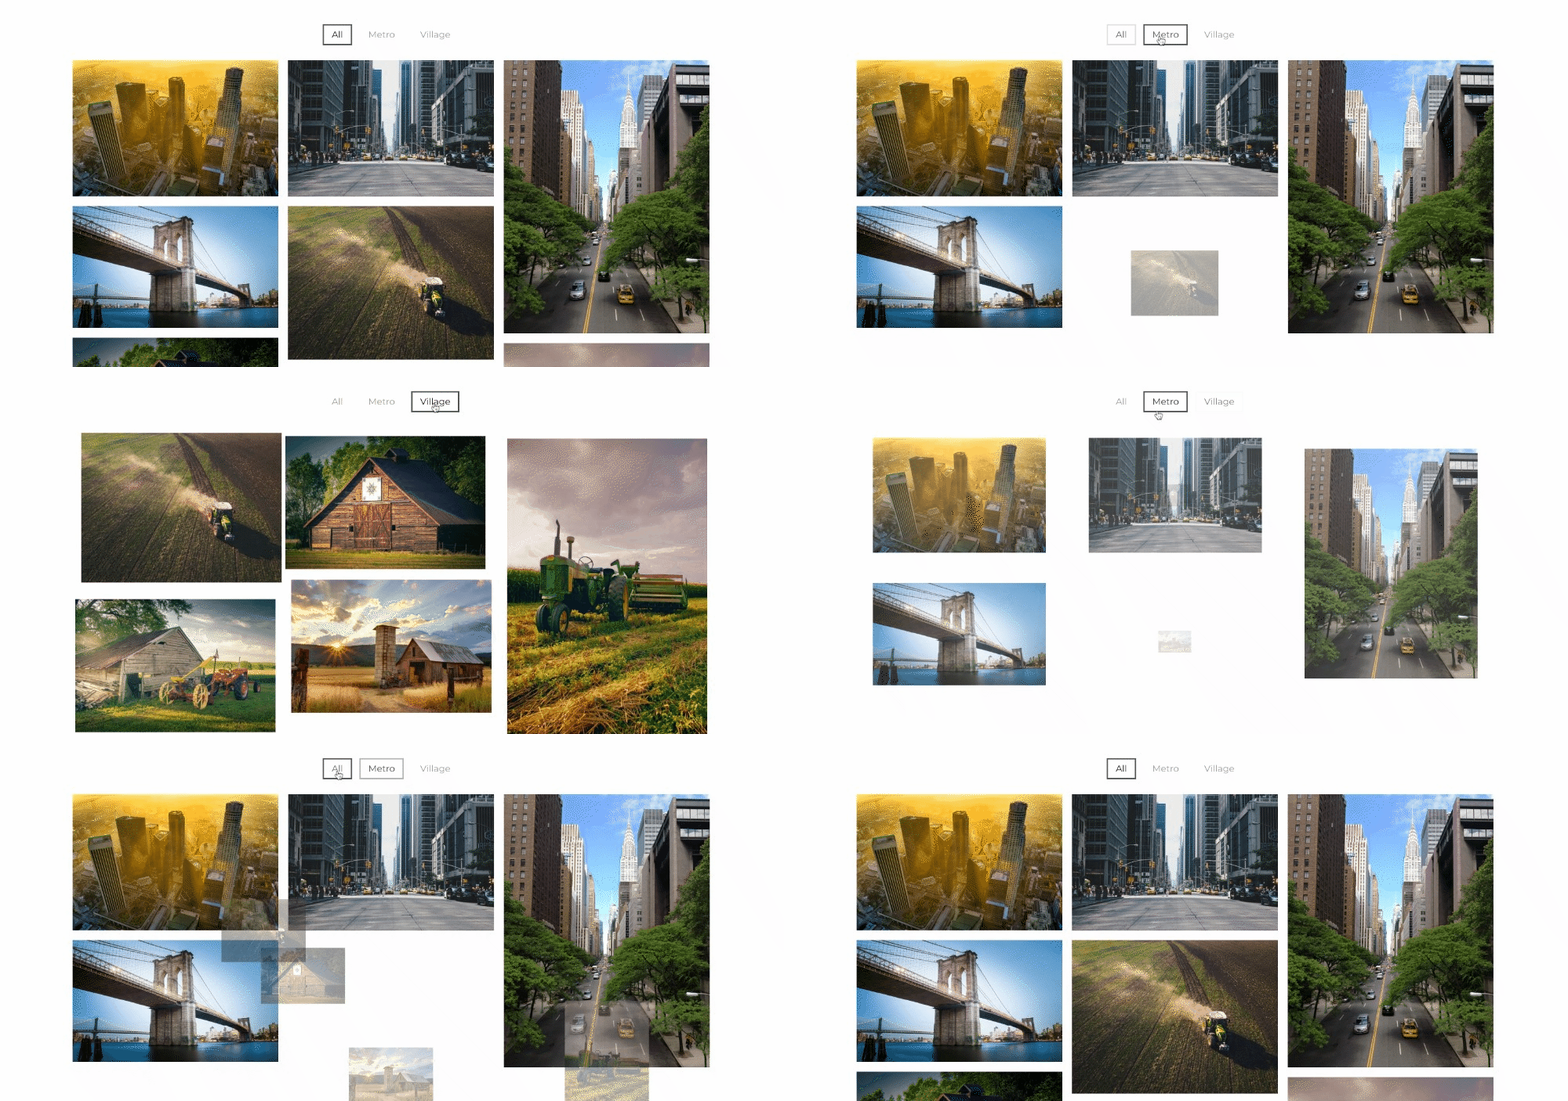
Wondering why you should go for the Max Addons Image Gallery element over the default one in Bricks Builder? Well, the default gallery element lets you create basic galleries, but adding filters requires coding skills.
To simplify the process and make it beginner-friendly, we introduce the Image Gallery element in Max Addons. With this, you won’t need any CSS or custom HTML knowledge.
With Max Addons adding category filters to your image gallery is as easy as abc!
So, let’s get started without any further ado!
1. Install and Activate Max Addons
First things first, make sure you’ve got Max Addons installed and activated on your WordPress website.
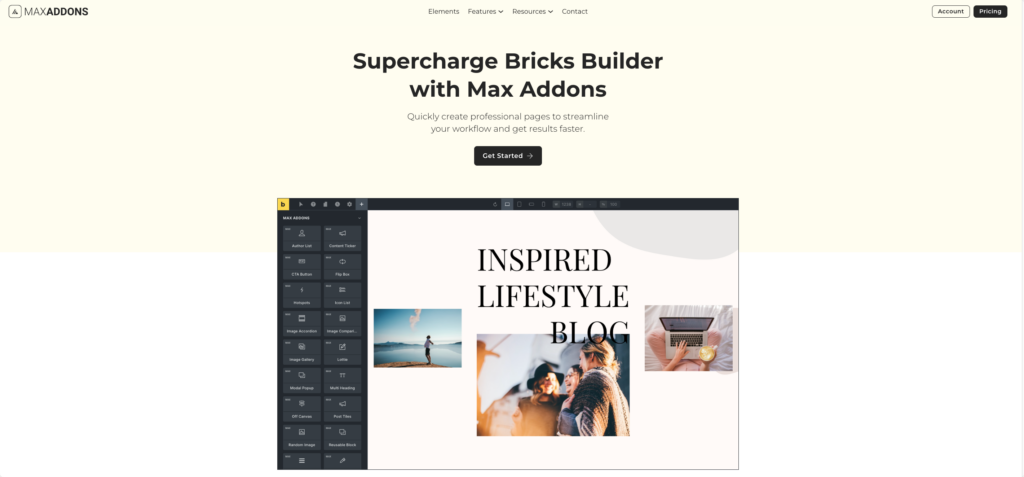
2. Create or Edit Your Page
Once you activate Max Addons, head to the WP dashboard and add a new page or edit the existing page where you want to showcase your image gallery.

3. Edit with Bricks Builder
After creating your new page, click the Edit With Bricks button.

4. Add the Image Gallery Element
Once the page opens, look for the “image gallery” element within the Bricks Builder elements area.
Once the element appears, click on it to add it to your page. Make sure to check the “Max” tag in the upper left corner of the icon.

When you add the element to the page, its setting option appears on the left panel. The Image gallery element includes the Content and Style tab.
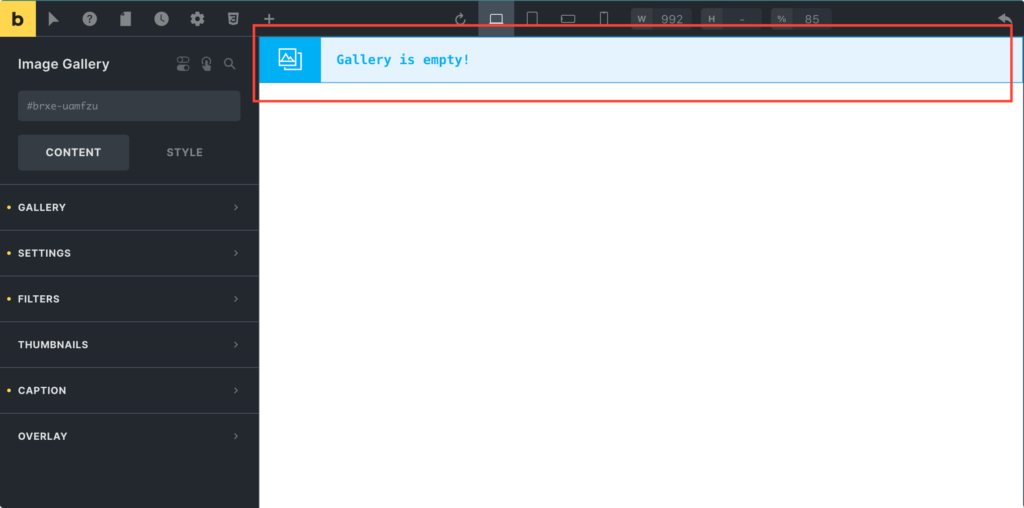
5. Choose Gallery Type: Standard or Filterable
In the Content tab, under the Gallery section, the first option is whether to create a Standard or Filterable gallery.
And because we’re making a filterable gallery, we chose the Filterable type.
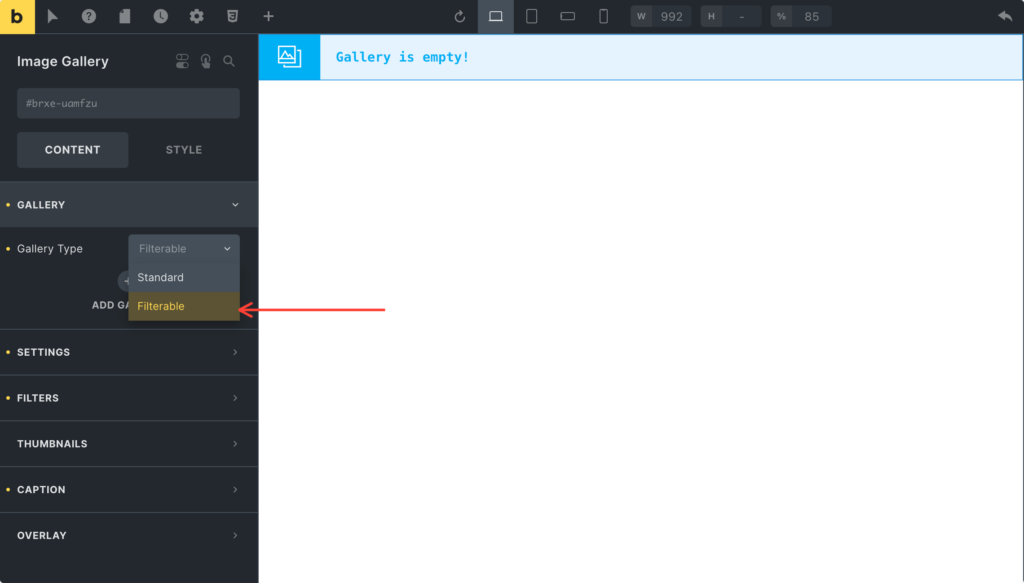
6. Add Gallery
Next, you need to add your images. To add pictures, click the + ADD GALLERY button, Select Images, and define a Filter Label.

7. Define Gallery Layout
Once you have added your images, open the Settings sections and pick the gallery layout that suits your taste – Masonry or Grid.

8. Define Columns, Spacing, and Order
In the Settings section, you can fine-tune the details by specifying the number of columns, spacing between images, and the order in which they appear.

9. Linking Options
Next, you get the flexibility to choose how you want your images to be linked – to a Lightbox, Attachment Page, Media File, or even add a Custom URL.

10. Tilt Effect (Optional)
You can enable the Tilt effect if you want to spice up your gallery with some dynamic movement.

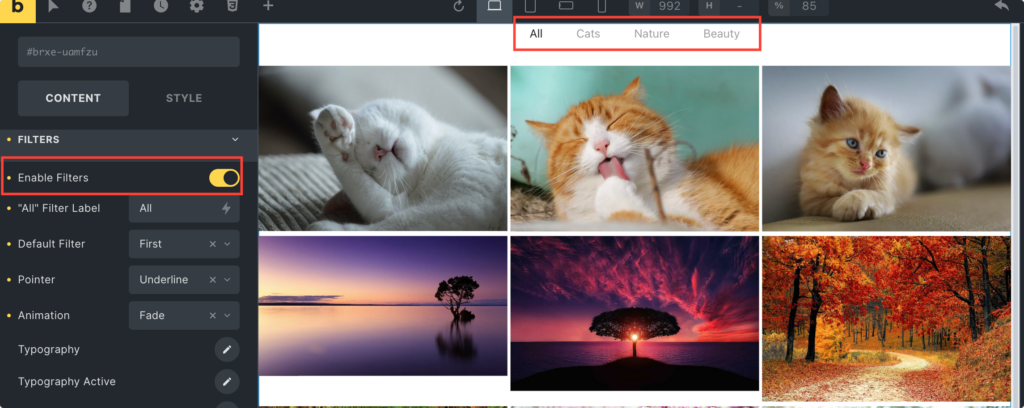
11. Enable Filters
After customizing settings, move to the Filters section. First, you need to toggle on the Filters button to display category filters at the top of your gallery.
12. Customize Filters, Add Filter Animation, and Alter Typography
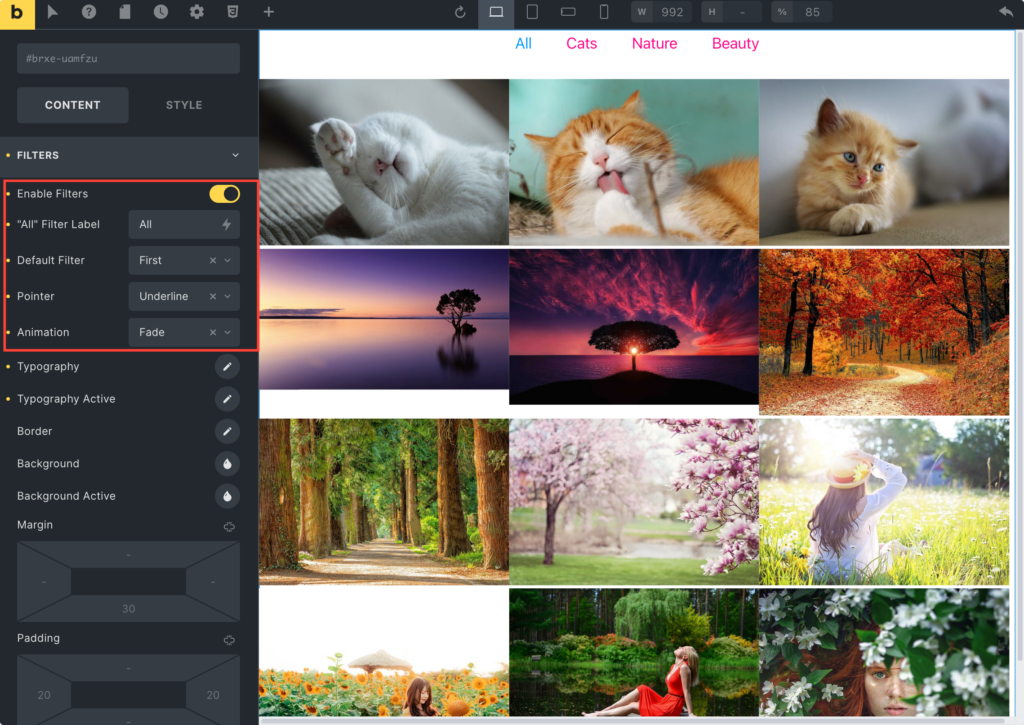
Next, you can change the “All” Filter Label, choose your default filter (First or Custom), and pick a pointer style – Underline, Overline, Double Line, Framed, and more.
You can also make the image gallery visually engaging by selecting an animation style – Grow, Slide, Fade, and more. Tweak the typography for both the filter text and the active filter to match your aesthetic.
13. Borders, Colors, and Spacing
Who doesn’t love clean designs? Right. So, with the Max Addons Image Gallery element, you can add a finishing touch by customizing borders around filters, choosing background colors, and adjusting spacing.

14. Thumbnail and Caption Customization
If you’d like, you can also add more styling with thumbnail customization, playing around with borders, image filters, and hover effects. Customize image captions with options like Caption Type, Position, Hover effects, Typography, and Background.
15. Background Overlay

Lastly, you can enhance the overall look of the image gallery by adding a background overlay that complements your images.
And there you have it – a captivating, filterable image gallery created effortlessly with Bricks Builder and the Max Addons Image Gallery Element.
Conclusion
With these steps, you can effortlessly create a captivating filterable image gallery using Bricks Builder and the Max Addons Image Gallery Element. Below is an example of how your gallery will look on the live page:

In addition to the Image Gallery element, Max Addons offers more than 20 unique elements. These elements can help you build your website faster, saving you time and money in the long run.
Want to streamline your website creation process? Get Max Addons today!
If you found this tutorial helpful, share your thoughts by commenting below!

2 comments