
Intro: In this article, we will explore the Bricks Builder default Conditions along with the enhanced conditions provided by Max Addons. These advanced conditions let users control the visibility of page content based on Post Types and WooCommerce Parameters.
Ever wanted to show/hide your web page contents based on time or date? Or ever wanted to display a section of a page only to a particular group of users, let’s say only to logged-in users?
If you own an eCommerce website, there will likely be many instances when you want to show or hide content based on different conditions, such as Product Ratings, Product Stock, Product Categories, and many more.
Well, you can do it all and more using the Conditions and Max Addons Display Conditions for Bricks Builder.
Conditions in Bricks Builder: Overview
Conditions, as the name says, help you add visibility conditions to your page content. This enables you to show/hide content only when users satisfy the condition set on the page.
Let’s say you’re running a Christmas sale on your website. To grab visitors’ attention, you wanted to display an attractive banner on the hero section on a particular date and time, and simultaneously, you also needed to remove the banner after the sales ended.
Now imagine the back and forth required to put and remove the banner. This is where conditions work like charm. You can create a banner and apply conditions to appear only for a particular duration. This saves your time and makes the whole process fully automated.
Bricks Builder, by default, offers plenty of conditions that allow you to show/hide your web page contents based on different parameters.
So, let’s discuss how you can access and use conditions in Bricks Builder.
How to Use Conditions in Bricks Builder
Before we dive deep, we first need to understand how the condition works.
- OR Relationship between Conditions: This implies that any defined conditions can be true for displaying the associated content. For example, if multiple conditions are specified, the content will be displayed if at least one is met.
- AND Relationship within a Condition: Inside each condition, multiple components are logically connected with an “AND” relationship. This means that all of these components must be true simultaneously for the condition as a whole to be true.
- Essential Parts of a Condition:
- Key: This represents the parameter or attribute the condition is based on. It could be any relevant aspect of the system, such as Post ID, Date, User Role, or any other parameter.
- Comparison Operand: This tells us how to compare the Value associated with the key. For example, we might check if something is equal to, not equal to, greater than, less than, or contains a specific value.
- Value: This is the specific thing we’re comparing against. It could be a number, a word, a checkbox being checked or not, a choice from a list, or any other kind of information that makes sense for what we’re trying to do.
- Example: Let’s say we have a display condition feature for a content management system:
- Condition 1: (Key: Date, Operand: >, Value: “2024-01-01”)
- Condition 2: (Key: User Role, Operand: ==, Value: “Admin”)
In this scenario, the content will be displayed if either of the following conditions is met:
- The current date is after January 1, 2024.
- The user role is “Admin”.
How to access conditions in Bricks Builder Elements
Now that we understand the key aspects of conditions let’s know how you can access them within your builder.
First, You need to enable the default Bricks Builder display condition feature.
To do that,
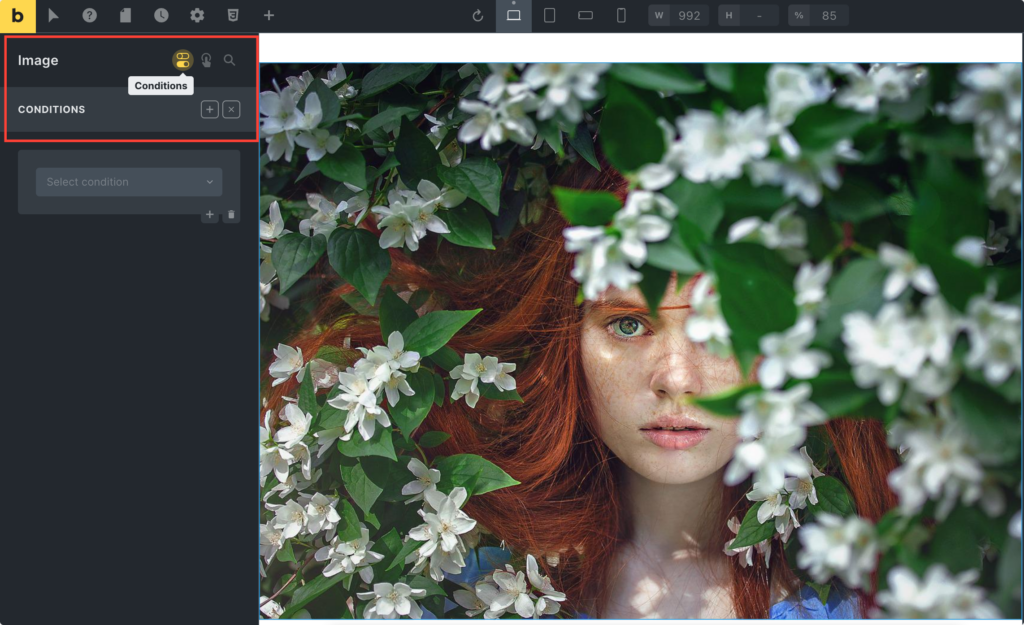
- Step 1: Open your page using Bricks editor, and add a Section, Container, or any Element of your choice.
- Step 2: Next, toggle on the Conditions option located at the top of the menu, and click the “+” sign to add conditions to your page.
Bricks Builder offers plenty of conditions to control what content is presented based on various criteria. These built-in conditions are categorized into 4 sections: Post, User, Date & Time, and Others.
Each category includes different conditions options to show/hide your page elements based on various parameters.
Bricks Builder Built-In Condition Types
Post Conditions
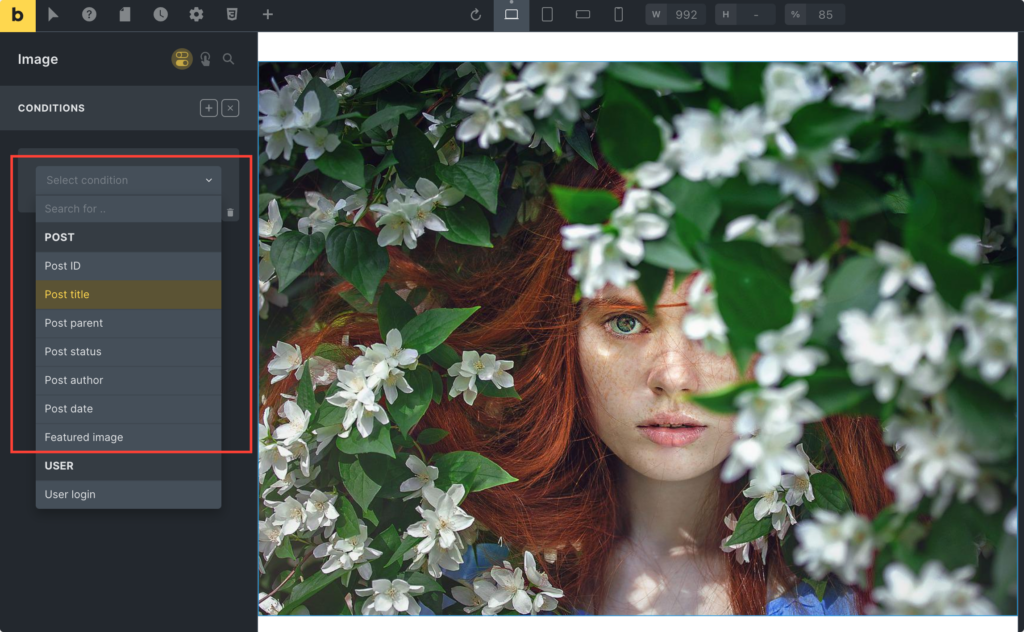
These conditions allow you to control elements based on various attributes of the post, such as ID, title, parent, status, author, date, and featured image.
Example: Suppose you have a blog where you publish both articles and videos. You could use post conditions to display a video player element only on posts with the post type “video” and a featured image element only on posts with the post type “article.”
- Post ID: This condition allows you to target specific posts on your website based on their unique ID numbers. Each post in WordPress has a unique ID assigned to it.
- Post title: With this condition, you can choose to display or hide elements based on the post’s title.
- Post parent: You can use this condition to target elements based on whether they are a child or parent of another post. It helps create conditional layouts.
- Post status: This condition allows you to show or hide elements based on the status of the post, such as “Published,” “Draft,” or “Pending Review.”
- Post author: You can target elements based on the post’s author. This is particularly useful for displaying author-specific content or information.
- Post date: With this condition, you can choose to display elements based on the post’s publication date. It’s useful for creating time-sensitive content.
- Featured image: This condition allows you to show or hide elements based on whether the post has a featured image set. Featured images are often used as thumbnails or header images for posts.
User Conditions
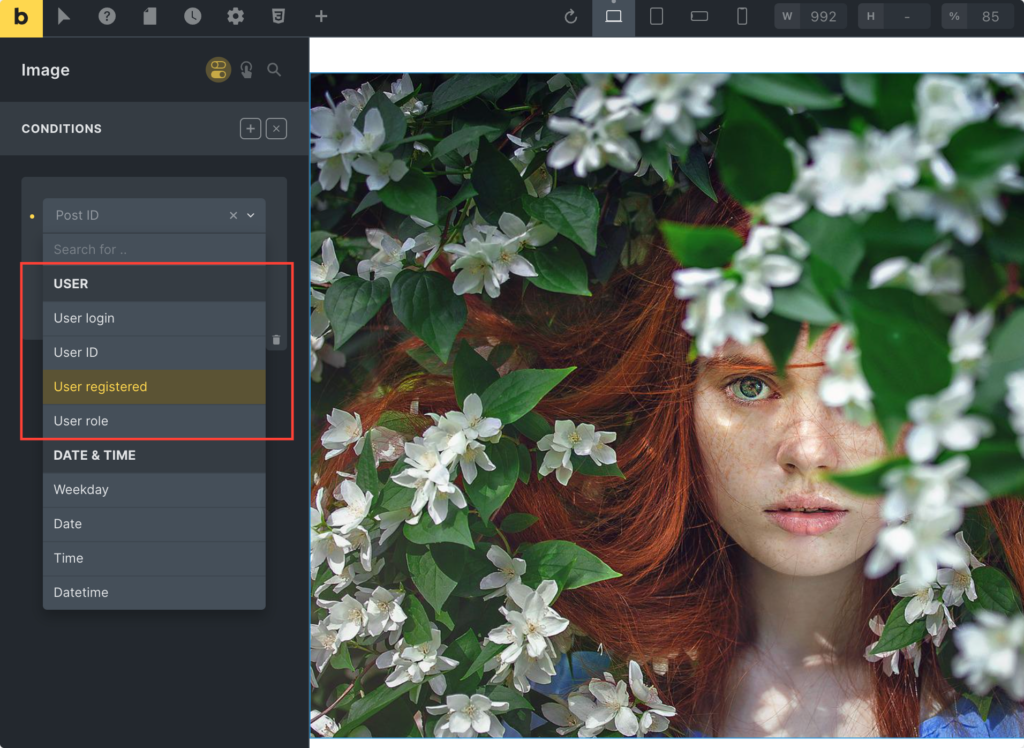
These conditions are related to user attributes and characteristics, such as login status, user ID, registration date, and user role.
Example: On a membership-based website, you could use user conditions to display premium content only to users who are logged in and have a subscription to a certain tier.
- User login: This condition allows you to show or hide elements based on whether the user is logged in to your website.
- User ID: You can target elements based on the unique ID number of the user. This is useful for creating personalized experiences for specific users.
- User registered: With this condition, you can choose to display elements based on when the user registered on your website. It’s helpful in offering incentives to new users.
- User role: This condition allows you to target elements based on the role of the user, such as “Subscriber,” “Author,” or “Administrator.”
Date & Time Conditions
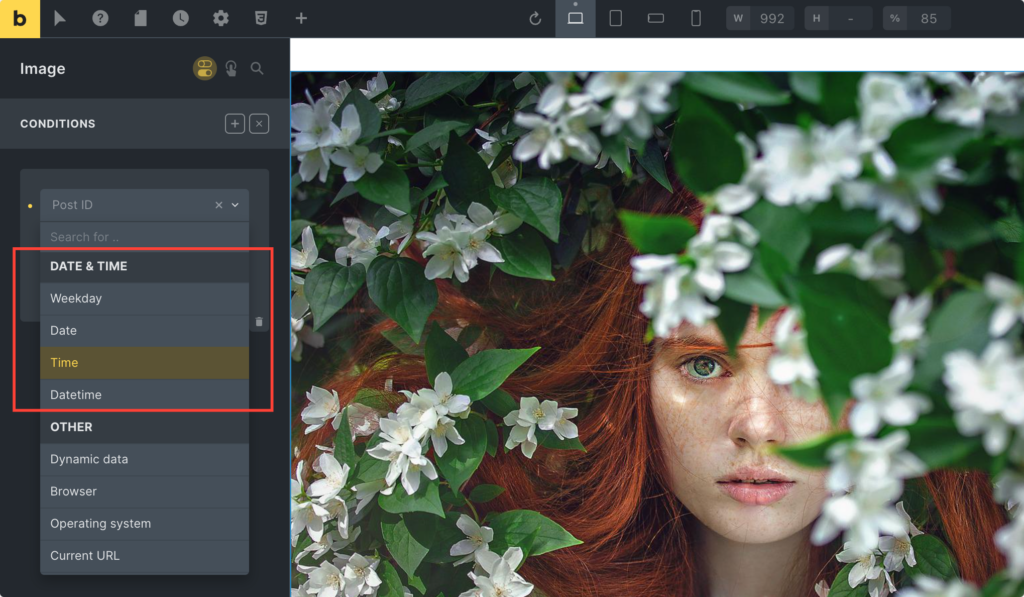
These conditions are based on dates and times, including weekdays, dates, times, and times.
Example: If you’re running a limited-time promotion, you could use date & time conditions to display a banner or pop-up promoting the sale only during specific dates and times, such as weekends or evenings.
- Weekday: With this condition, you can show or hide elements based on the day of the week. It’s helpful in creating weekday-specific promotions or events.
- Date: This condition allows you to display elements only on specific dates. It’s useful for creating holiday-themed content or promotions.
- Time: You can target elements based on the time of day with this condition. It’s useful for creating time-sensitive offers or announcements.
- Datetime: This condition allows you to specify a combination of date and time to show or hide elements. It’s useful for scheduling content or promotions to start and end at specific times.
Other Conditions
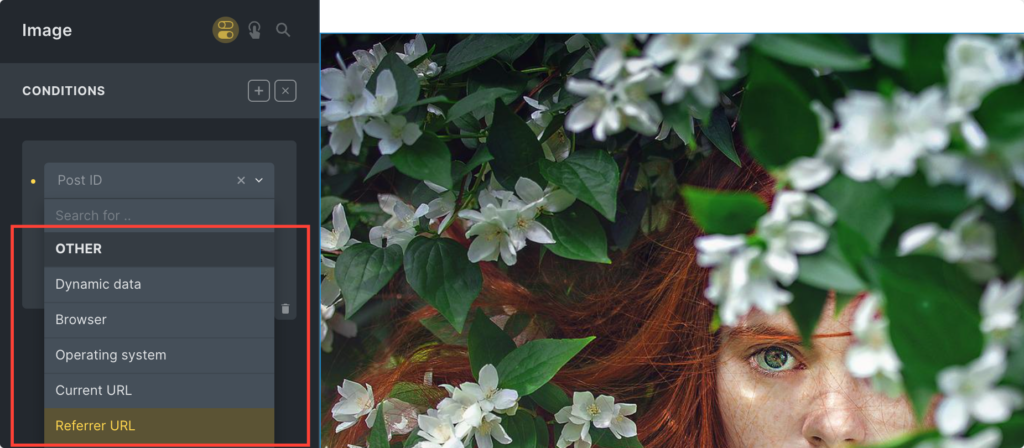
These conditions include various dynamic data, browser, and URL-related conditions, such as dynamic data, browser type, operating system, current URL, and referrer URL.
Example: Let’s say you’re promoting a mobile app and want to encourage users to download it. You could use browser and operating system conditions to display a download button only to visitors using mobile devices.
- Dynamic data: This condition allows you to use dynamic data from various sources, such as user input or server-side variables.
- Browser: With this condition, you can target elements based on the visitor’s web browser (e.g., Chrome, Firefox, Safari).
- Operating system: You can target elements based on the visitor’s operating system (e.g., Windows, macOS, iOS, Android).
- Current URL: This condition allows you to show or hide elements based on the current page’s URL. It’s useful for creating page-specific content.
- Referrer URL: With this condition, you can target elements based on the URL of the referring page. It’s useful for tracking where your visitors are coming from.
Max Addons Conditions for Posts Type & WooCommerce Parameters
Above, we have seen the default conditions come in Bricks Builder. But what if users require more control over their content display or are required to show/hide pages on WooCommerce parameters? This is where Max Addons got your back!
With Max Addons, you have complete flexibility to showcase content on your web pages based on different custom rules and WooCommerce parameters.
Let’s see how you can use these display conditions to show/ hide content on your WordPress website built with Bricks Builder.
Once you enable the default Conditions of Bricks Builder, you’ll find a drop menu with the built-in condition options of Bricks. Scroll the menu till you see the name tag Max Addons.
Max Addons Conditions
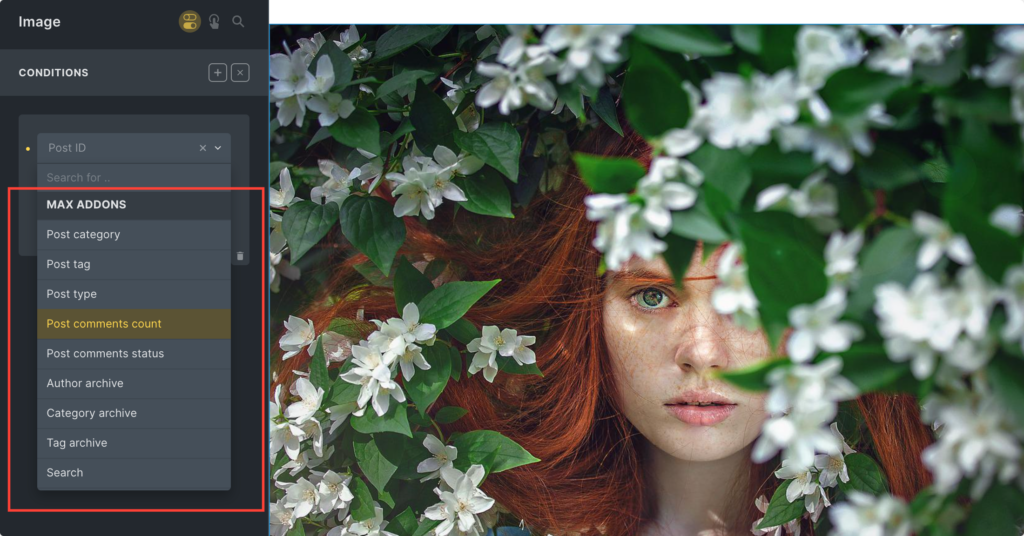
These conditions are related to post categories, tags, types, comments, archives, and request parameters.
Example: If you have a blog with multiple authors, you could use post-author conditions to display an author bio element only on posts written by guest authors, enhancing their visibility on the site.
- Post category: This condition allows you to display or hide elements based on the category of the post. It’s useful for creating category-specific content or promotions.
- Post tag: With this condition, you can target elements based on the tags assigned to the post. It’s useful for creating tag-specific content or recommendations.
- Post type: This condition allows you to show or hide elements based on the post type, such as “Post,” “Page,” or custom post types.
- Post comments count: With this condition, you can target elements based on the number of comments on the post. It’s useful for encouraging discussion on posts with fewer comments.
- Post comments status: This condition allows you to display elements based on the comment status of the post, such as “Open,” “Closed,” or “Password protected.”
- Category archive: this condition allows you to display elements exclusively on category archive pages.
- Tag archive: With this condition, you get the ability to target audience interests by displaying elements exclusively on tag archive pages.
- Search: You can use this condition to display page content based on the searched keywords.
- Request Parameter: This condition shows elements based on specific URL parameters.
WooCommerce Conditions
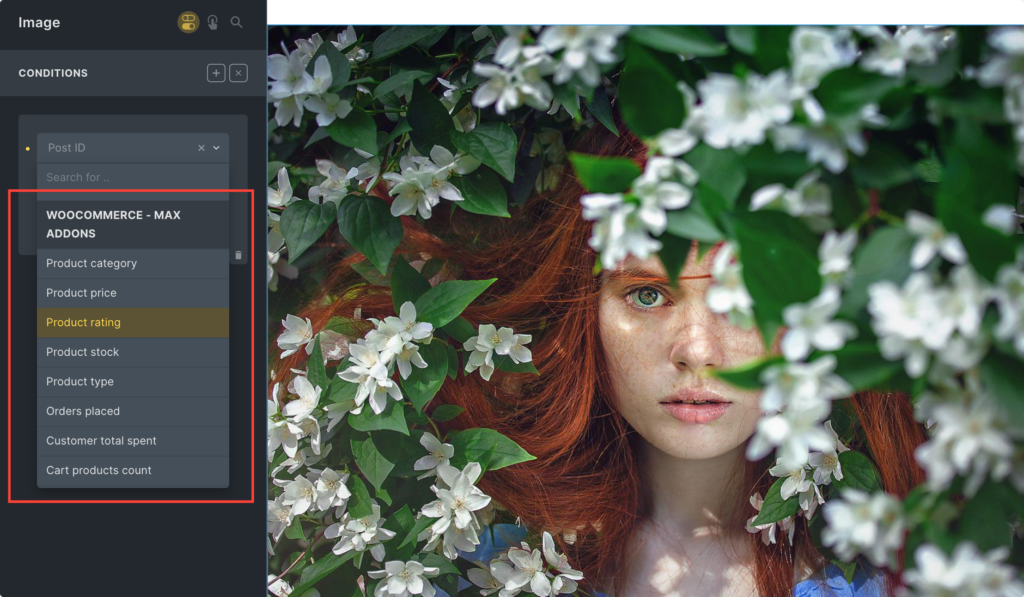
These conditions are specific to WooCommerce and include product-related attributes, such as product category, price, rating, stock, type, orders placed, customer total spent, cart products count, cart products, and cart total.
Example: Suppose you’re running a flash sale on certain products in your WooCommerce store. You could use product price conditions to display a “Flash Sale” badge only on products with a discounted price, attracting attention to the limited-time offer.
- Product category: With this condition, you can show or hide elements based on the WooCommerce product category. It’s helpful in creating category-specific product promotions or recommendations.
- Product price: With this condition, you can target elements based on the price of the WooCommerce product. It’s useful for creating price-specific offers or discounts.
- Product rating: This condition allows you to display elements based on the rating of the WooCommerce product. It’s helpful in highlighting highly rated products or offering incentives for leaving reviews.
- Product stock: With this condition, you can show or hide elements based on the stock availability of the WooCommerce product. It’s useful for creating urgency by highlighting products with low stock.
- Product type: This condition allows you to target elements based on the type of WooCommerce product, such as “Simple product,” “Variable product,” or “External/Affiliate product.”
- Cart Product Categories: This condition lets you display content according to the product categories in a customer’s cart.
- Cart Product Count: With this condition, you can display content based on the number of products in the cart.
- Cart Total: You can apply this condition to content based on the cart’s total amount, including taxes, shipping, and discounts.
- Cart Subtotal: Use this condition to showcase content based on the cart’s subtotal before tax, shipping, and discounts.
- Current Category Page: You can display content based on the current category page.
- Last Purchased Date: use this condition to show page content to customers who made previous purchases on specific dates.
- Orders Placed: You can target visitors to show content based on the number of orders a customer has placed.
- Purchased Items Categories: This condition displays content related to customers’ purchased categories.
Wrapping Up!
I am sure by using conditions, you can make your site more flexible and tailored to your visitors’ needs.
And with the new conditions introduced by Max Addons, there are even more possibilities to explore. Not only this, but Max Addons provides over 20 unique elements. These elements can rocket your website-building process, ultimately saving you time and money. Ready to simplify your website creation journey? Get Max Addons today!
If you found this helpful tutorial, feel free to share your thoughts by commenting below!
Also Learn: