
Intro: In this post, we’ll teach you how to create an Off Canvas menu in Bricks Builder using Max Addons. By the end of this post, you’ll be able to create interactive, beautiful, and responsive off-canvas menus without worrying about any code!
Menus are an important element of any website. There are plenty of navigation menu types that one can use according to their website design. Today, we are going to talk about the most popular navigation menu type: Off Canvas Menu.
Off-canvas menus provide a clean way to present navigation options on smaller screens. They allow users to focus on the main content until they need to access the other website pages; at this point, they can do so with a simple gesture or click.
Off-canvas menu designs are particularly advantageous for mobile devices, where screen space is limited. They allow for efficient use of space, ensuring that users can access menu options without sacrificing the focus on content. However, in this era of creative design, many website designers consider adding off-canvas menus as part of their main design, which means showcasing off-canvas for all screen types.
This is because the off-screen menu design saves valuable screen space by keeping the main interface clean and uncluttered. Users appreciate the simplicity and ease of finding what they need without being overwhelmed by a crowded navigation bar. This streamlined design enhances the overall user experience, making navigation smoother and more intuitive.
Off Canvas & Hamburger Menu: The Difference
Many people often get confused between a Hamburger Menu and an Off-Canvas Menu. So before we proceed to our tutorial, let’s quickly understand the difference between them.
Off Canvas and Hamburger menus are often used interchangeably, but they’re not exactly the same.
- Hamburger Menu: The hamburger menu refers to the three horizontal lines stacked on each other, resembling a hamburger. When you see this icon on a website or app, it usually means there’s a hidden menu waiting to be revealed.
- Off-Canvas Menu: An off-canvas menu refers to the layout pattern where content is placed in an off-screen hidden container until activated. When you trigger it—maybe by clicking on the hamburger icon—it smoothly slides into view, covering part of the main screen.
In simple terms, the hamburger menu is the button, and the off-canvas menu appears when you press that button. They work together to give you easy access to menu options without cluttering the main screen.
Create Off Canvas Menu in Bricks Builder Using Max Addons
Creating an off-canvas menu is challenging! If you’re not familiar with coding, making one of these menus can require tons of time and effort.
So, what’s the best way for beginners to showcase off-canvas menus on a website?
If you have a WordPress website built using Bricks Builder, the best tool that you can use is the Max Addons Off Canvas menu element.
Max Addons Off Canvas element allows you to add attractive off-canvas or flyouts on your page. You can display custom text, fetch the WordPress default menu, or any saved template in the off-canvas panel.
Additionally, you get plenty of customization and styling options to alter the menu design according to your website theme and branding.
So, without further ado, let’s see how to create a canvas menu in WordPress using Bricks Builder and Max Addons.
1. Install and Activate Max Addons
First, ensure you’ve got Max Addons installed and activated on your WordPress website.

2. Create a New Page
After activating Max Addons, head to your WordPress website dashboard and add a new page.

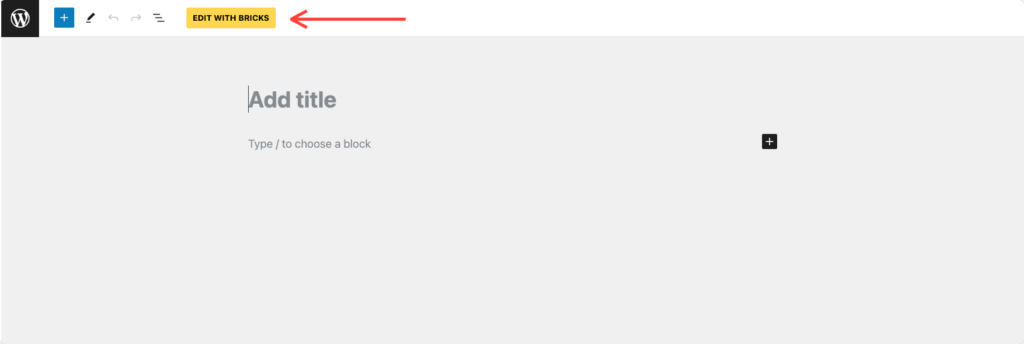
3. Edit with Bricks Builder
After creating your page, click the Edit With Bricks button.
4. Add the Off Canvas Element
Once you open the page:
- Find the “Off Canvas” element in the Bricks Builder elements section.
- Click on it to add it to your page.
- Verify that the “MAX” tag is displayed on the upper left corner of the icon.

5. Choose Off Canvas Content
When you add the element to the page, its settings appear on the left panel.
The first option in the Content tab is Off Canvas Content. Here, you decide which Content Type to include in your menu.
You can select the website’s default Menu, choose pre-designed Templates, and even add your custom Content.

6. Select Trigger Type
Next, we’ve got the Trigger Options. These are how you want people to open your menu. You have the option to display a Button or Icon to open the off-canvas panel. Alternatively, you have the flexibility to select any other element on the page using Element Class or Element ID trigger options.

If you choose a button or icon as your trigger, you can style it with more styling options—you can adjust its size, color, and even font to make it stand out.
7. Customize Label
The next option is Label. These are the nametags you can put next to the menu. You have the choice to display them or not, and if you choose to do so, you can customize their appearance by adjusting typography, changing the background, adding margins, and more.

8. Advanced Off Canvas Settings
In the Settings tab, you’ll find options to fine-tune how your menu behaves. You can decide which direction the menu slides in from, how it transitions, and whether it closes on pressing the Esc key or closes on Overlay Click.

9. Define Off Canvas Style
After configuring the content settings, you can enhance the overall appearance of your menu using the Off Canvas Style options. Here, you can adjust its size, add padding for comfort, and choose a background color or image to make it visually appealing.

10. Style Content
Now, let’s shift our attention to the appearance of the content within your menu. You have the flexibility to adjust the padding to provide some space around your content, align everything neatly, select appealing fonts, apply background colors, experiment with borders, and even add depth with shadows.

11. Customize Close Button
Lastly, we’ve got the Close Button. This is what people click to close the off-canvas menu. You can pick an icon for it and adjust its appearance to match the rest of your menu.

12. Save the Page as a Header Template
After completing all the customization and ensuring you’re satisfied with the off-canvas design, save the page or section as a header template.
The Brick Builder’s default settings will then automatically apply the template as the header across your entire site. However, if you prefer not to display the canvas menu on all site pages, you can control its visibility in Template Settings >> Conditions.
Wrapping Up!
With Max Addons, creating an off-canvas menu in Bricks Builder is straightforward and can greatly enhance your website’s functionality. Following the steps outlined in this guide, you can effortlessly implement an off-canvas menu that enhances user experience and provides easy navigation for your visitors.
Here’s an example showcasing how your off-canvas menu will appear on the live page:

In addition to the Off Canvas Element, Max Addons offers over 20 unique elements designed to supercharge your website-building process. These elements can significantly streamline your workflow, ultimately saving you valuable time and resources. Are you ready to elevate your website creation journey? Get Max Addons today!
If you found this helpful tutorial, feel free to share your thoughts by commenting below!
1 comment